Going Mechanical
A long-time user of the MS Ergonomic series of split keyboards, I finally made the switch – pun intended – to a mechanical keyboard. This has been long in the making. I’ve been aware of excellent designs like the Keyboardio Model 100 or the Ultimate Hacking Keyboard for a while and even got to test the predecessor of the Model 100 a while back. Ultimately I decided to go with the Iris from Keeb.io because it offers the greatest flexibility short of designing a keyboard yourself. Keeb.io sell pre-built versions of the Iris as well but the extra degree of control over the parts appealed to me more. Plus the Iris can be programmed with the popular QMK firmware which transfers to the majority of keyboards out there whereas both Keyboardio and UHK both roll their own firmware.
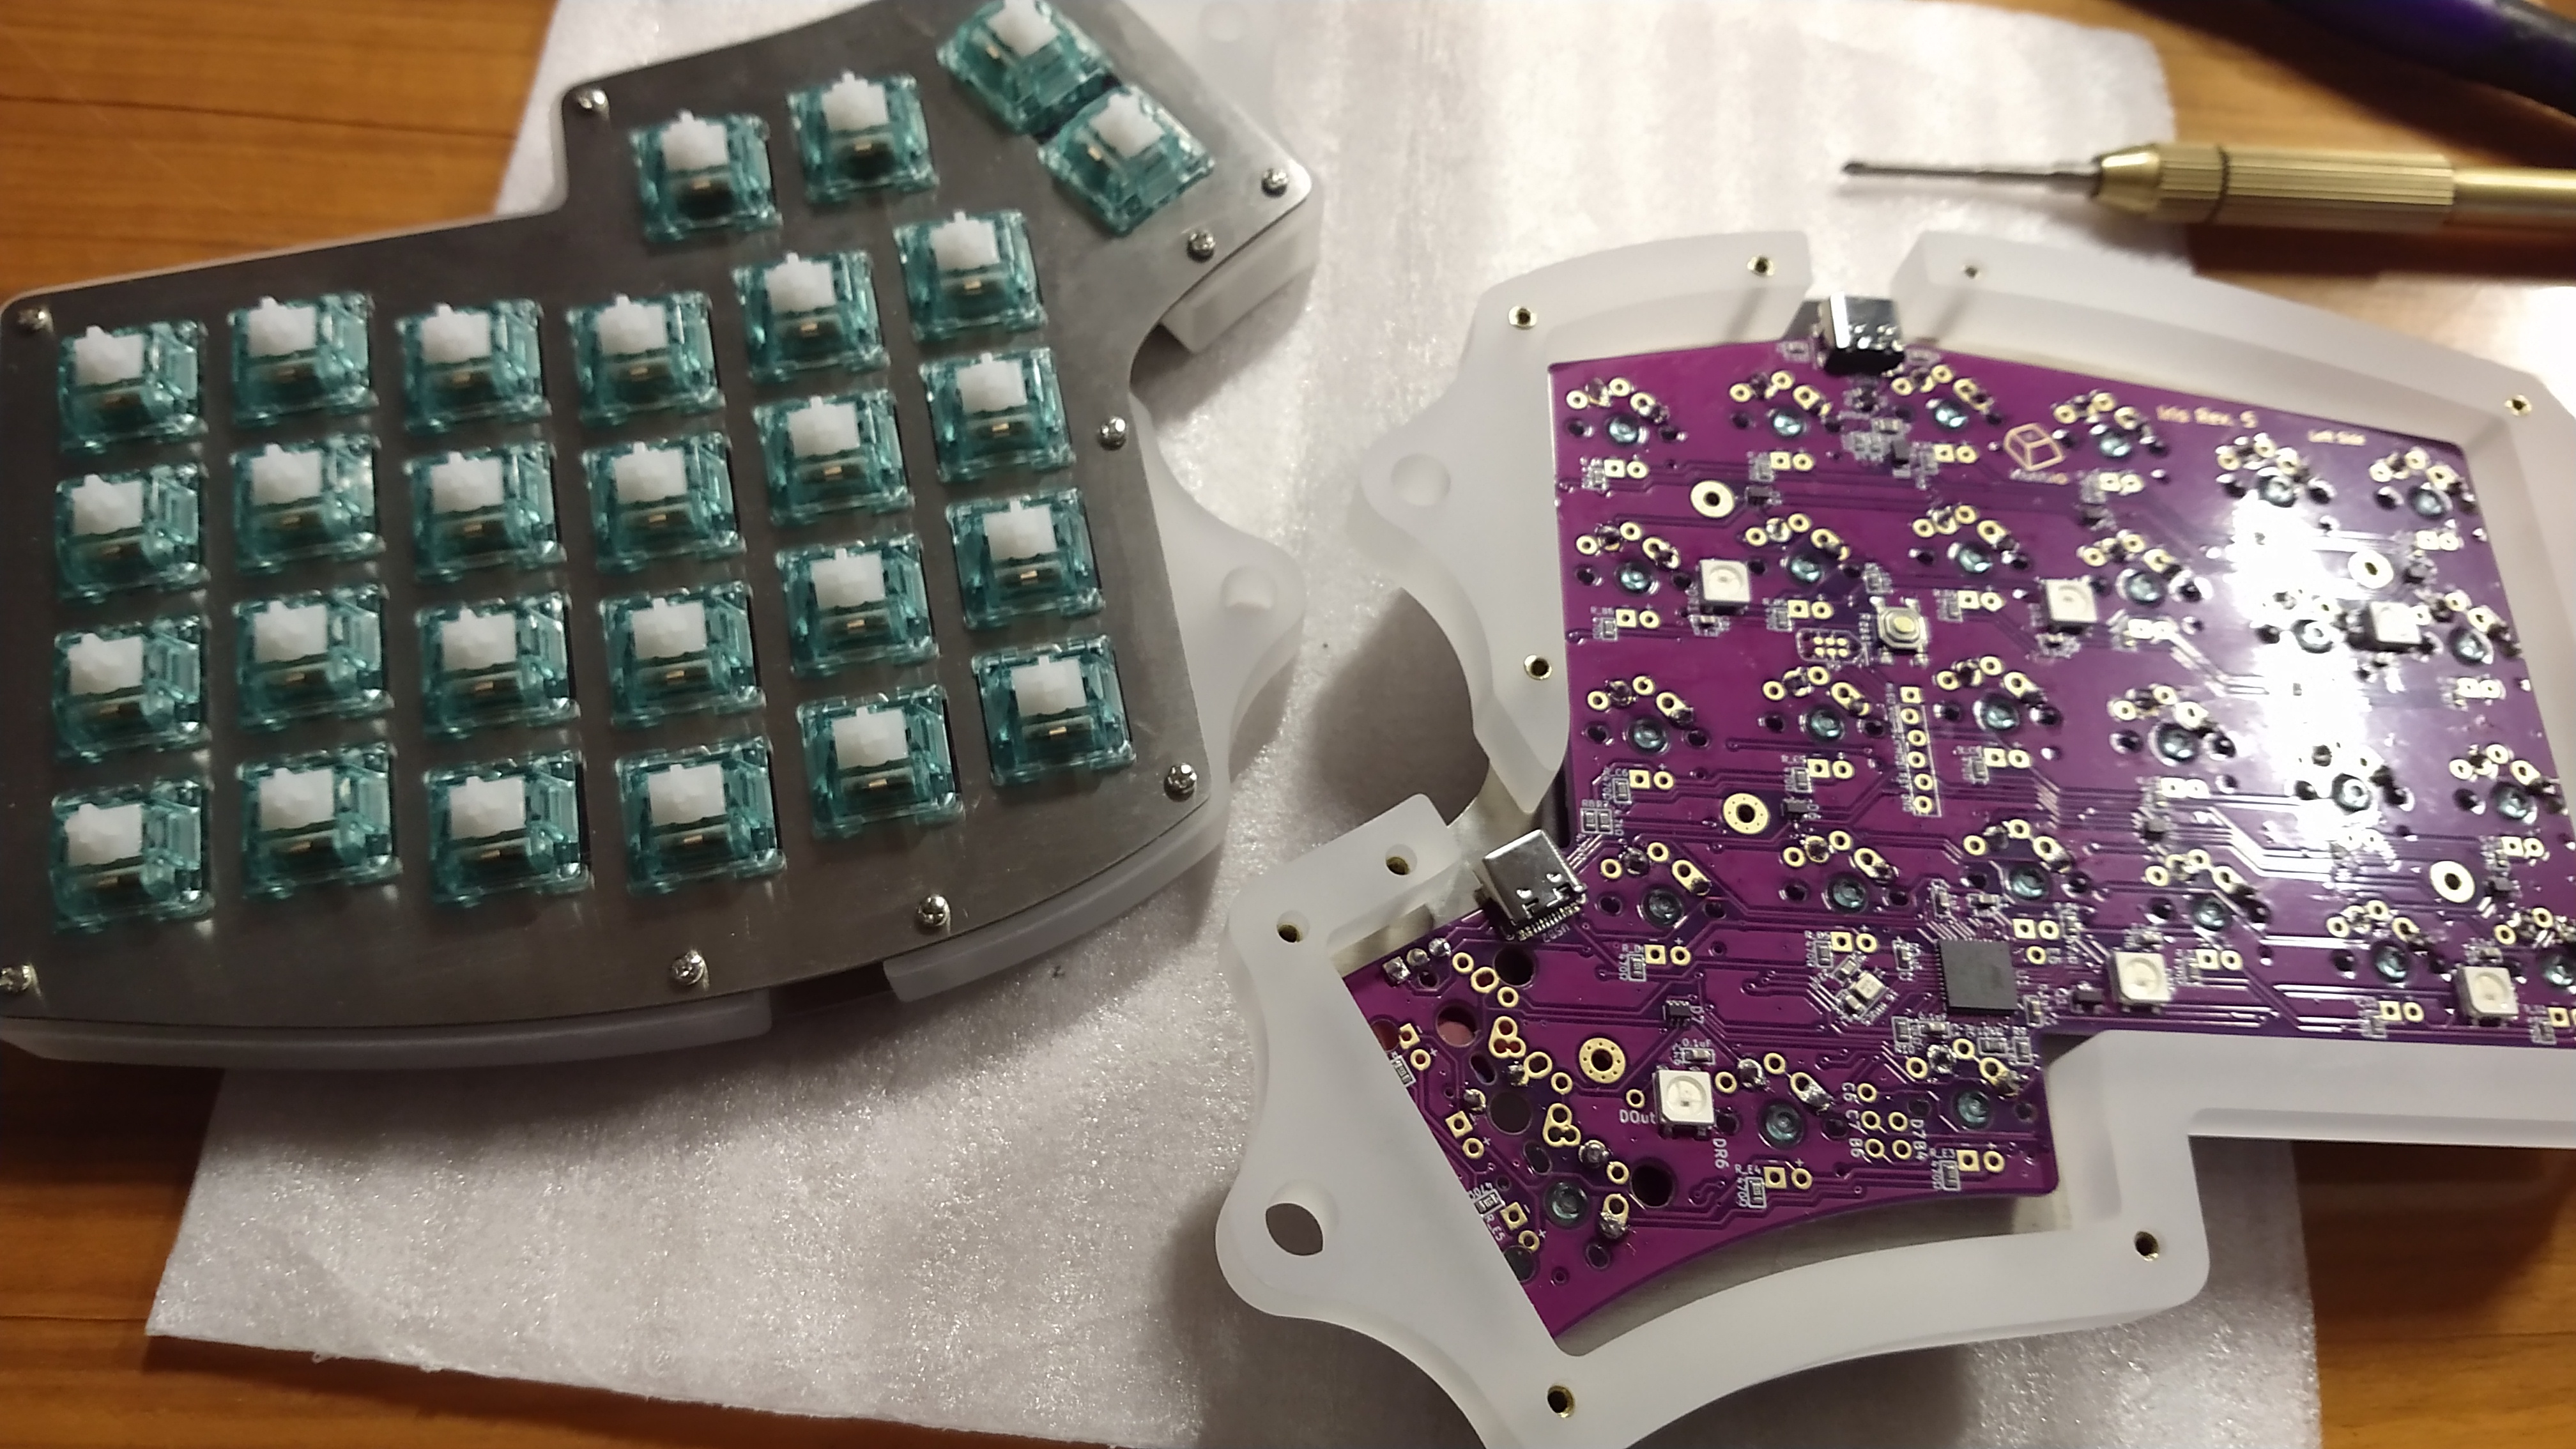
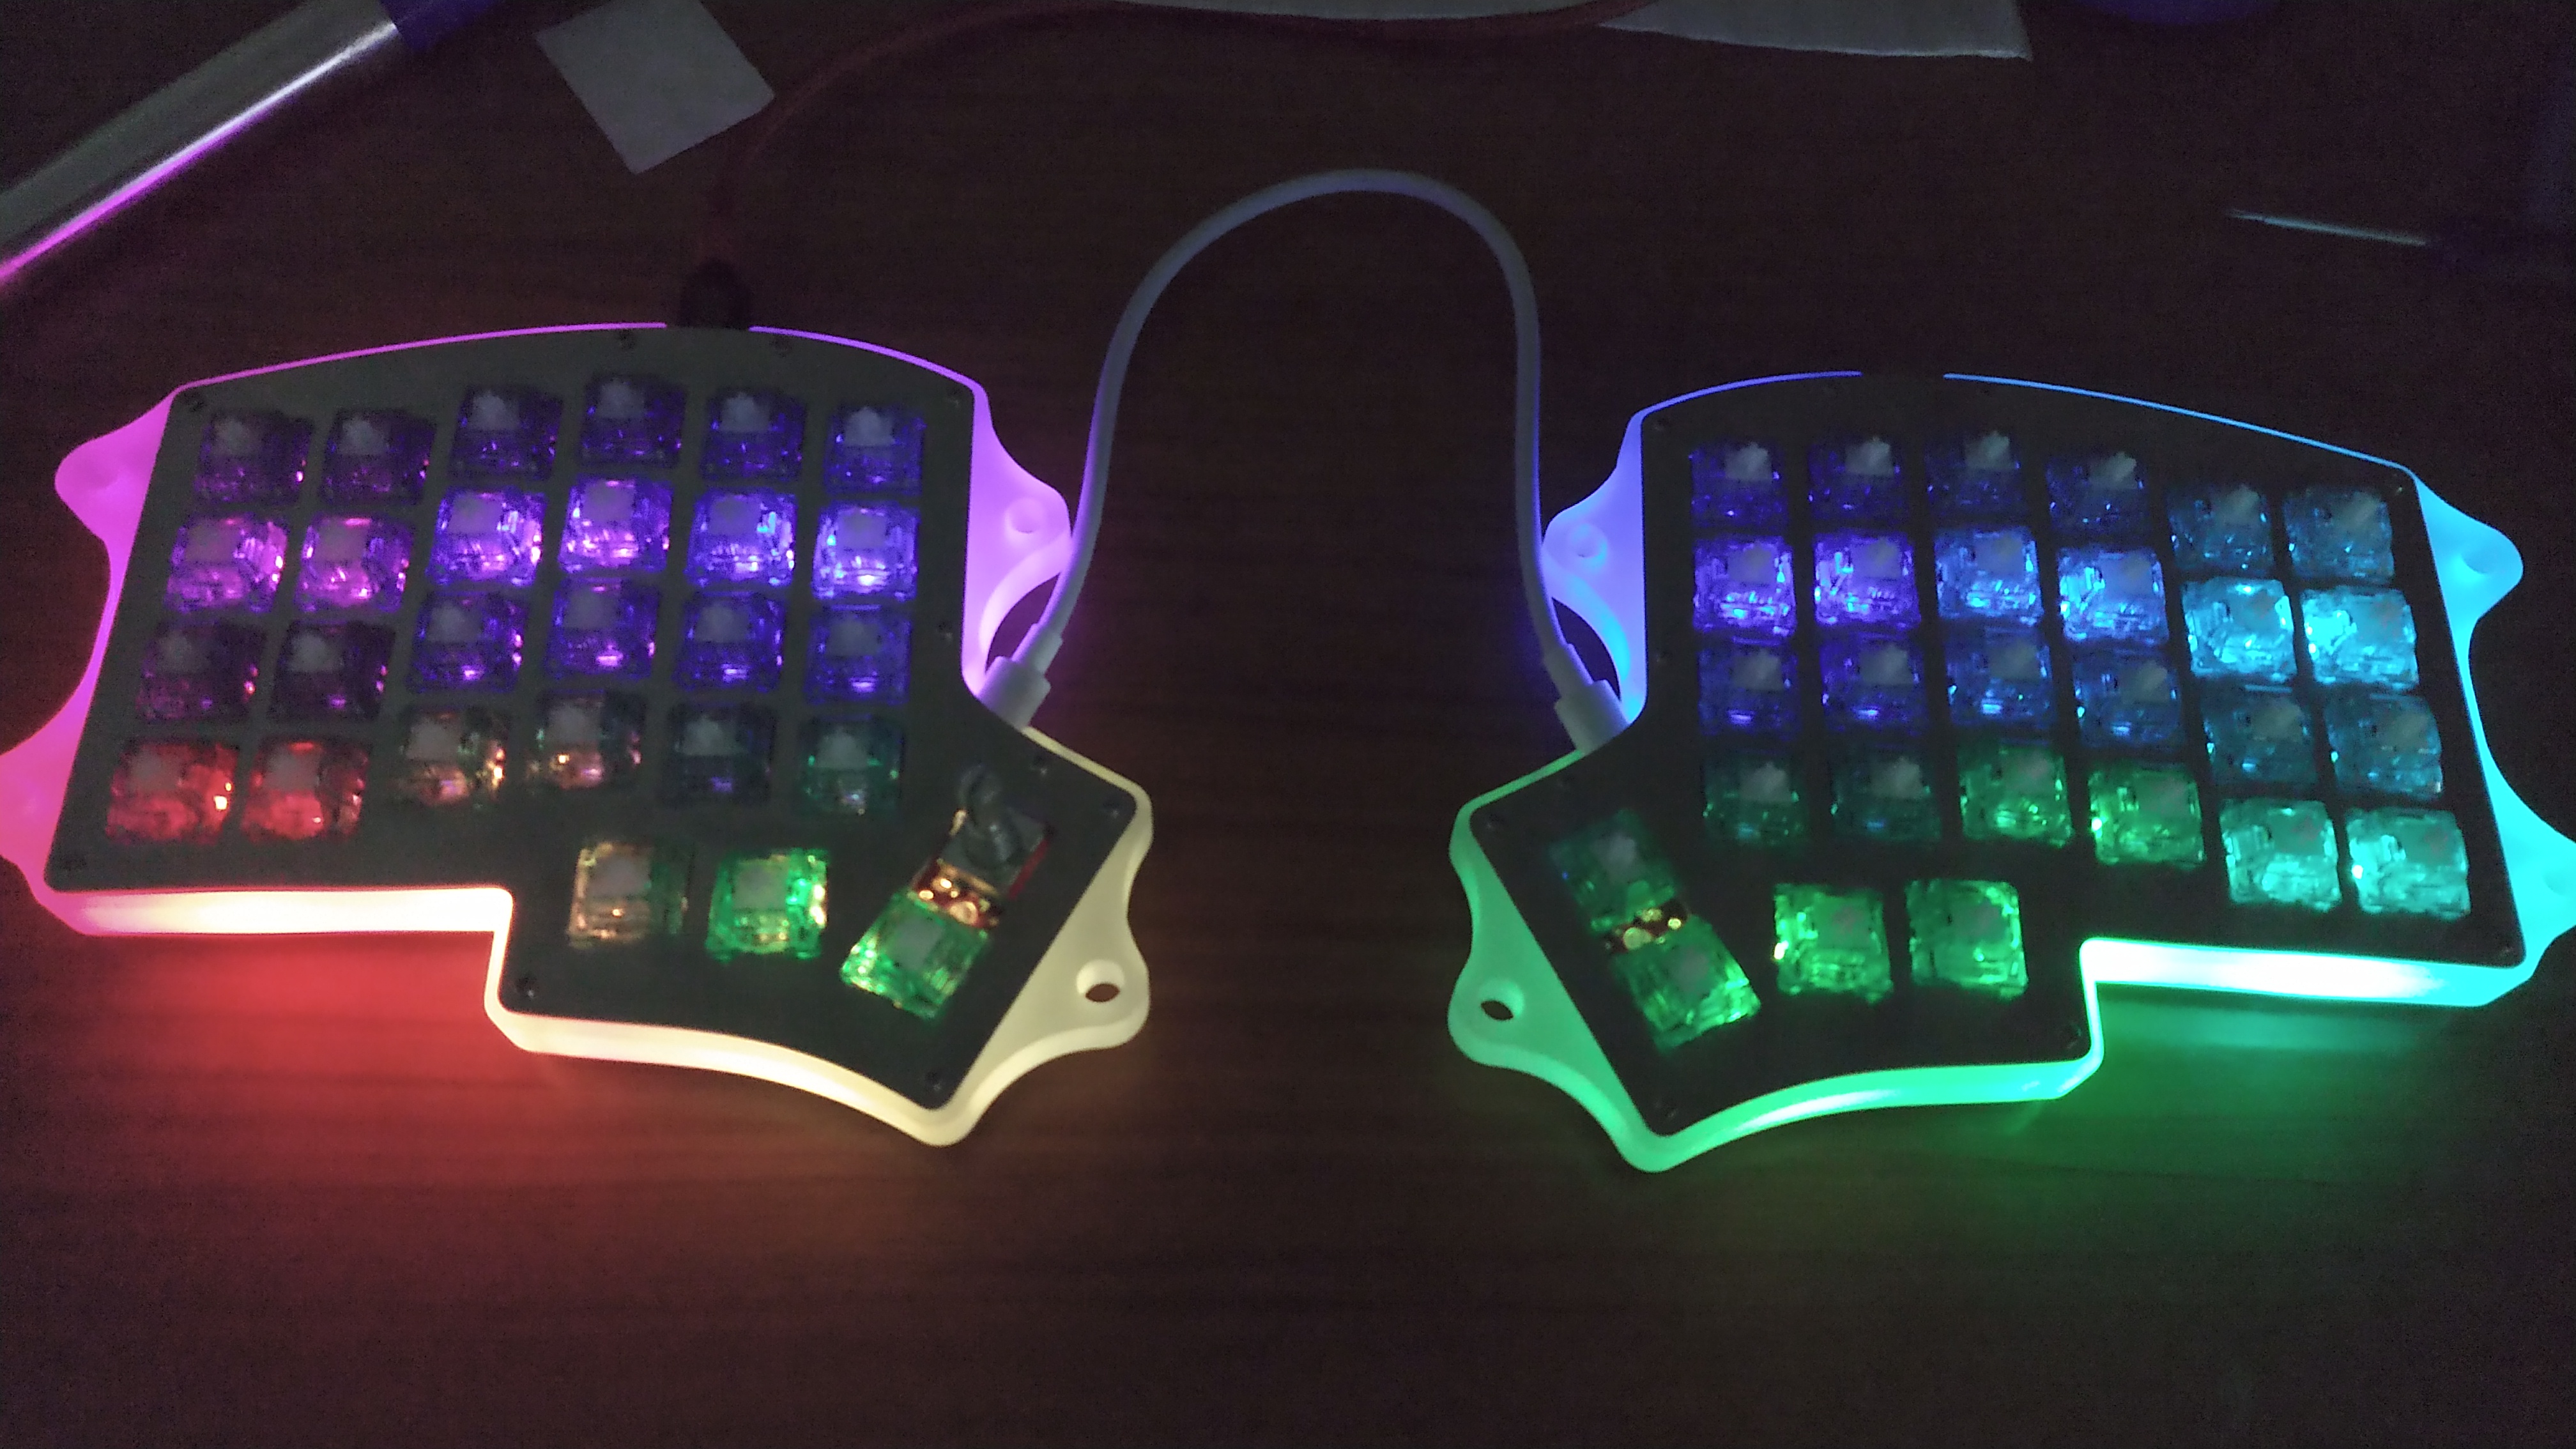
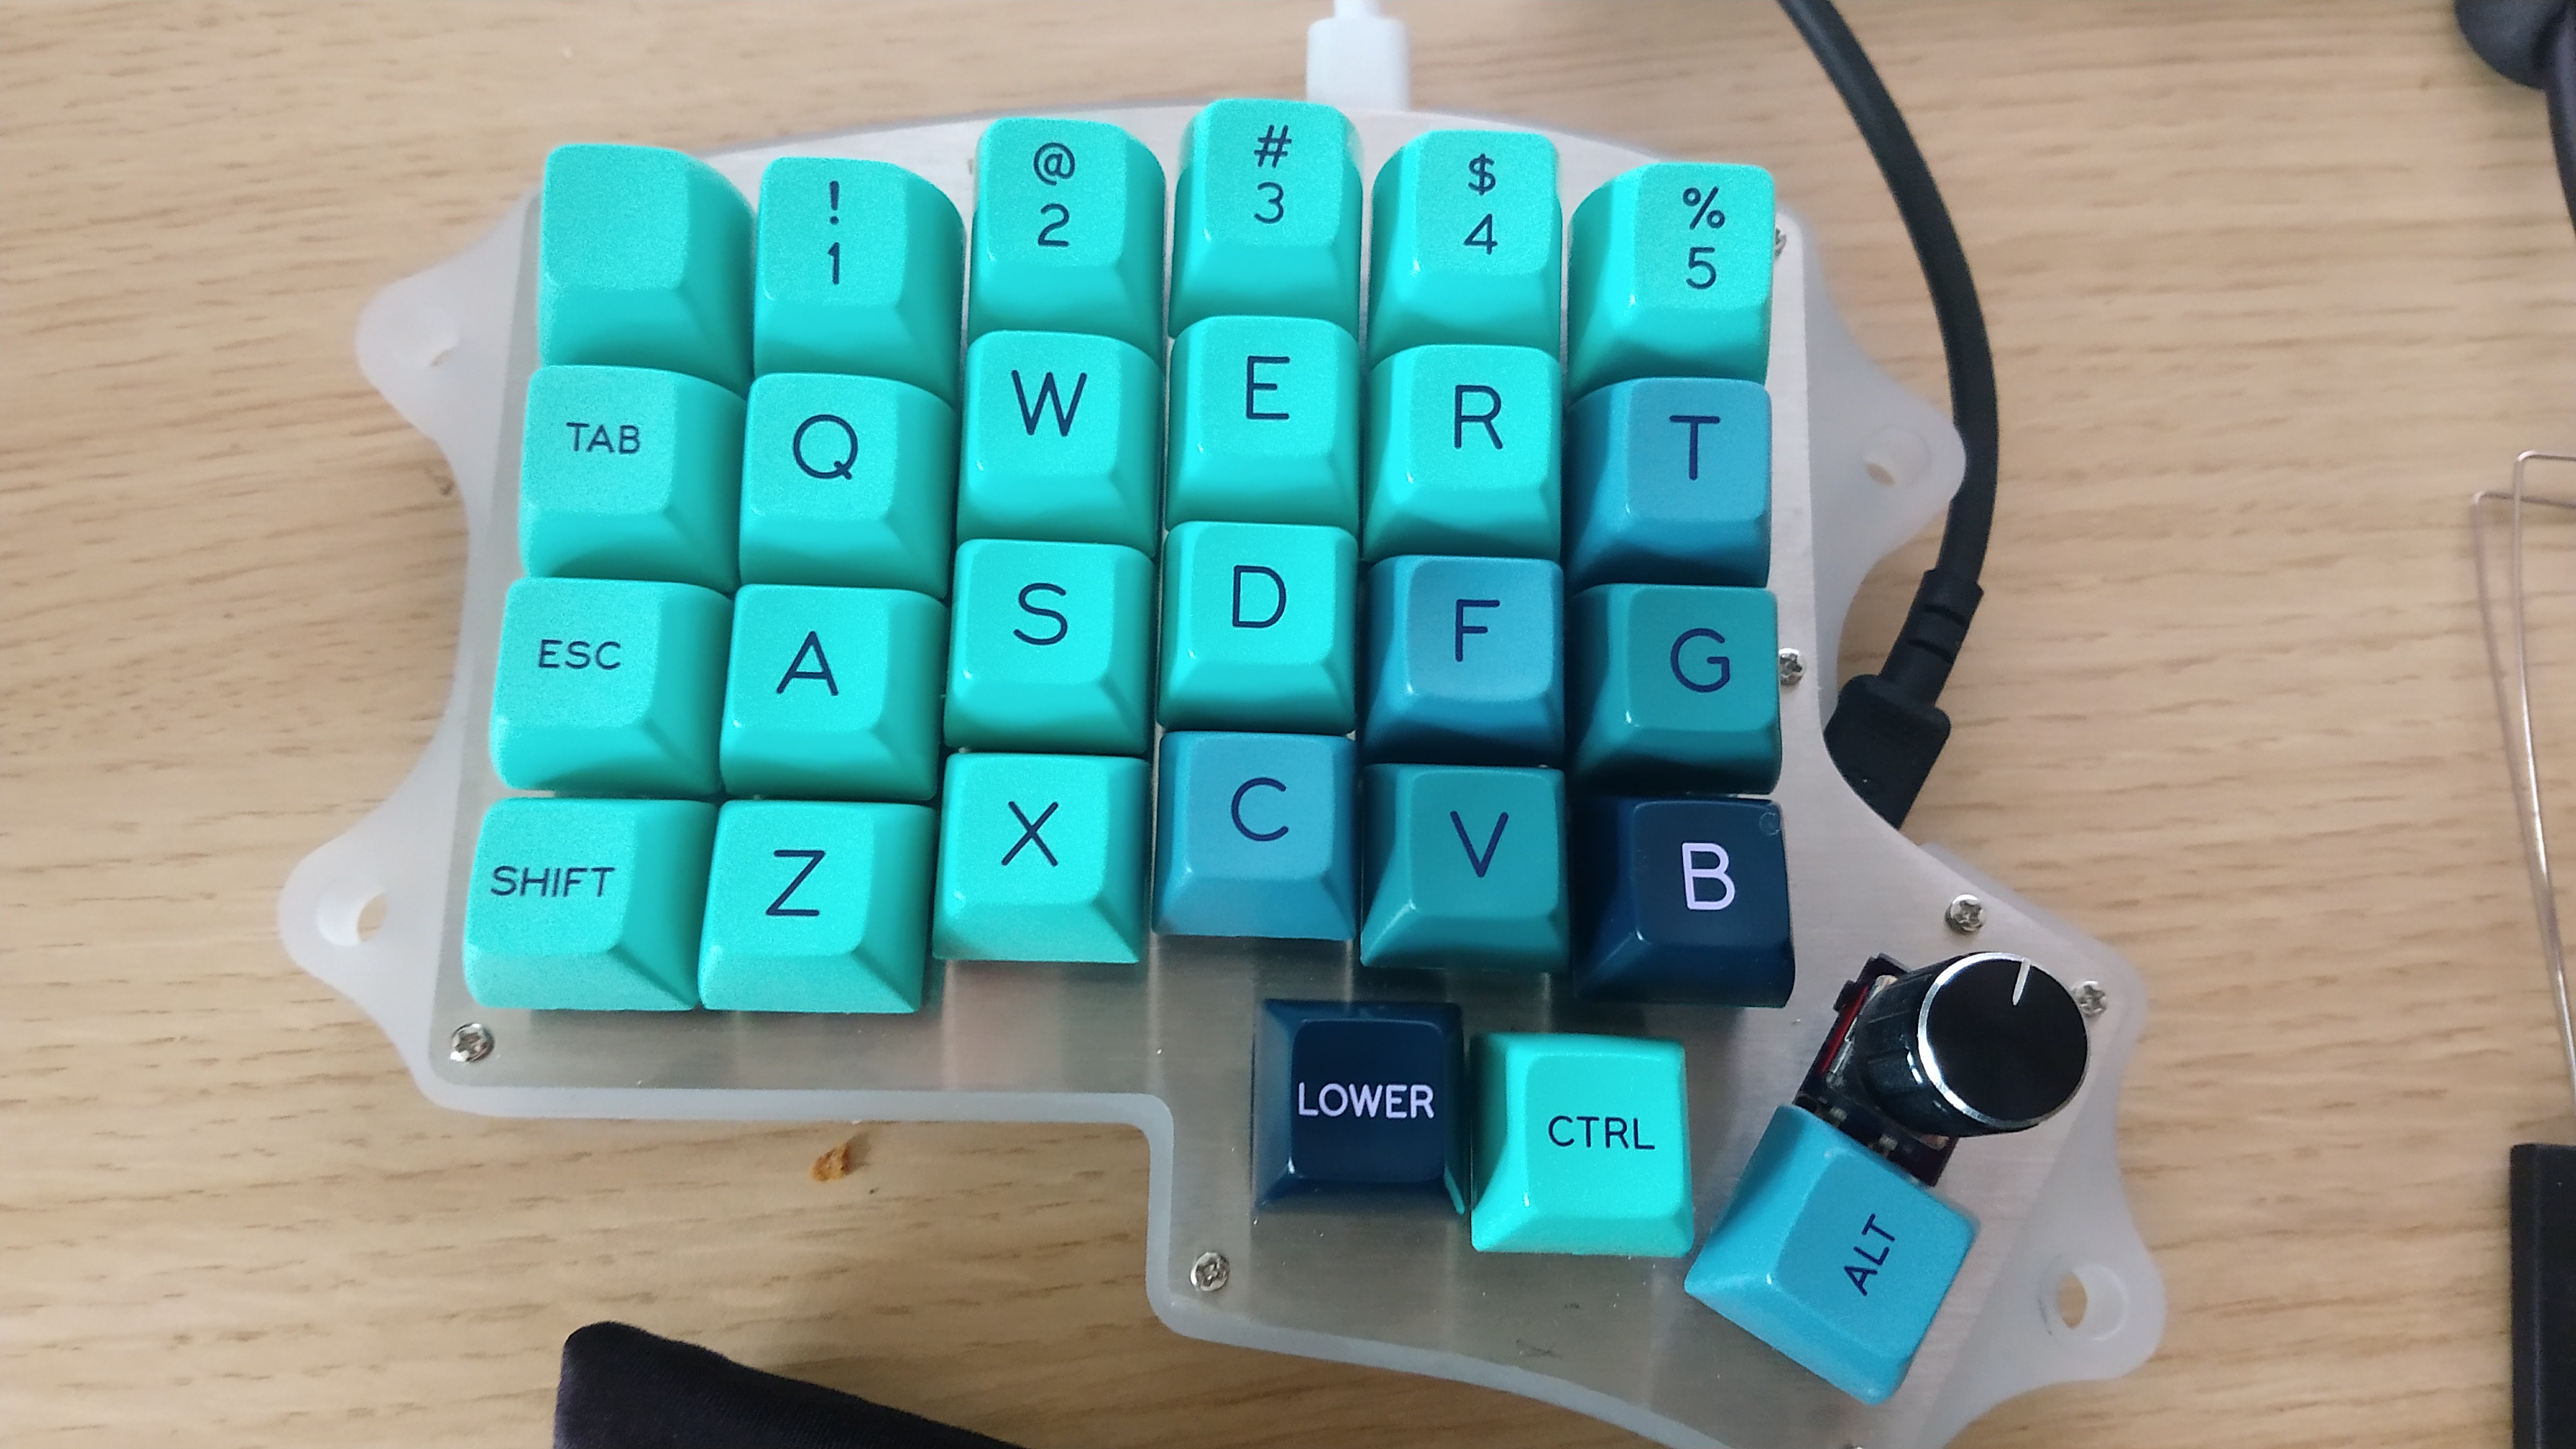
The Iris model 2 is a compact (60%) mechanical design with a split ergonomic layout and vertically staggered keys. The PCB has four slots for thumb keys on each half, two of which can optionally accept a two unit wide key. Apart from that one exception all the key slots are single unit so any set of keycaps for ortholinear keyboards will fit. Each half comes with an ATmega32u4 microcontroller on board and has six RGB LEDs on the underside. Optionally tenting can be achieved with four adjustable M6 screws. Keeb.io sell stylish aluminum cases for the Iris but not only are they expensive – a case can cost more than a fully assembled keyboard –, they’re also unnecessary. With brushed steel plates the Iris has protection enough and looks quite futuristic already.
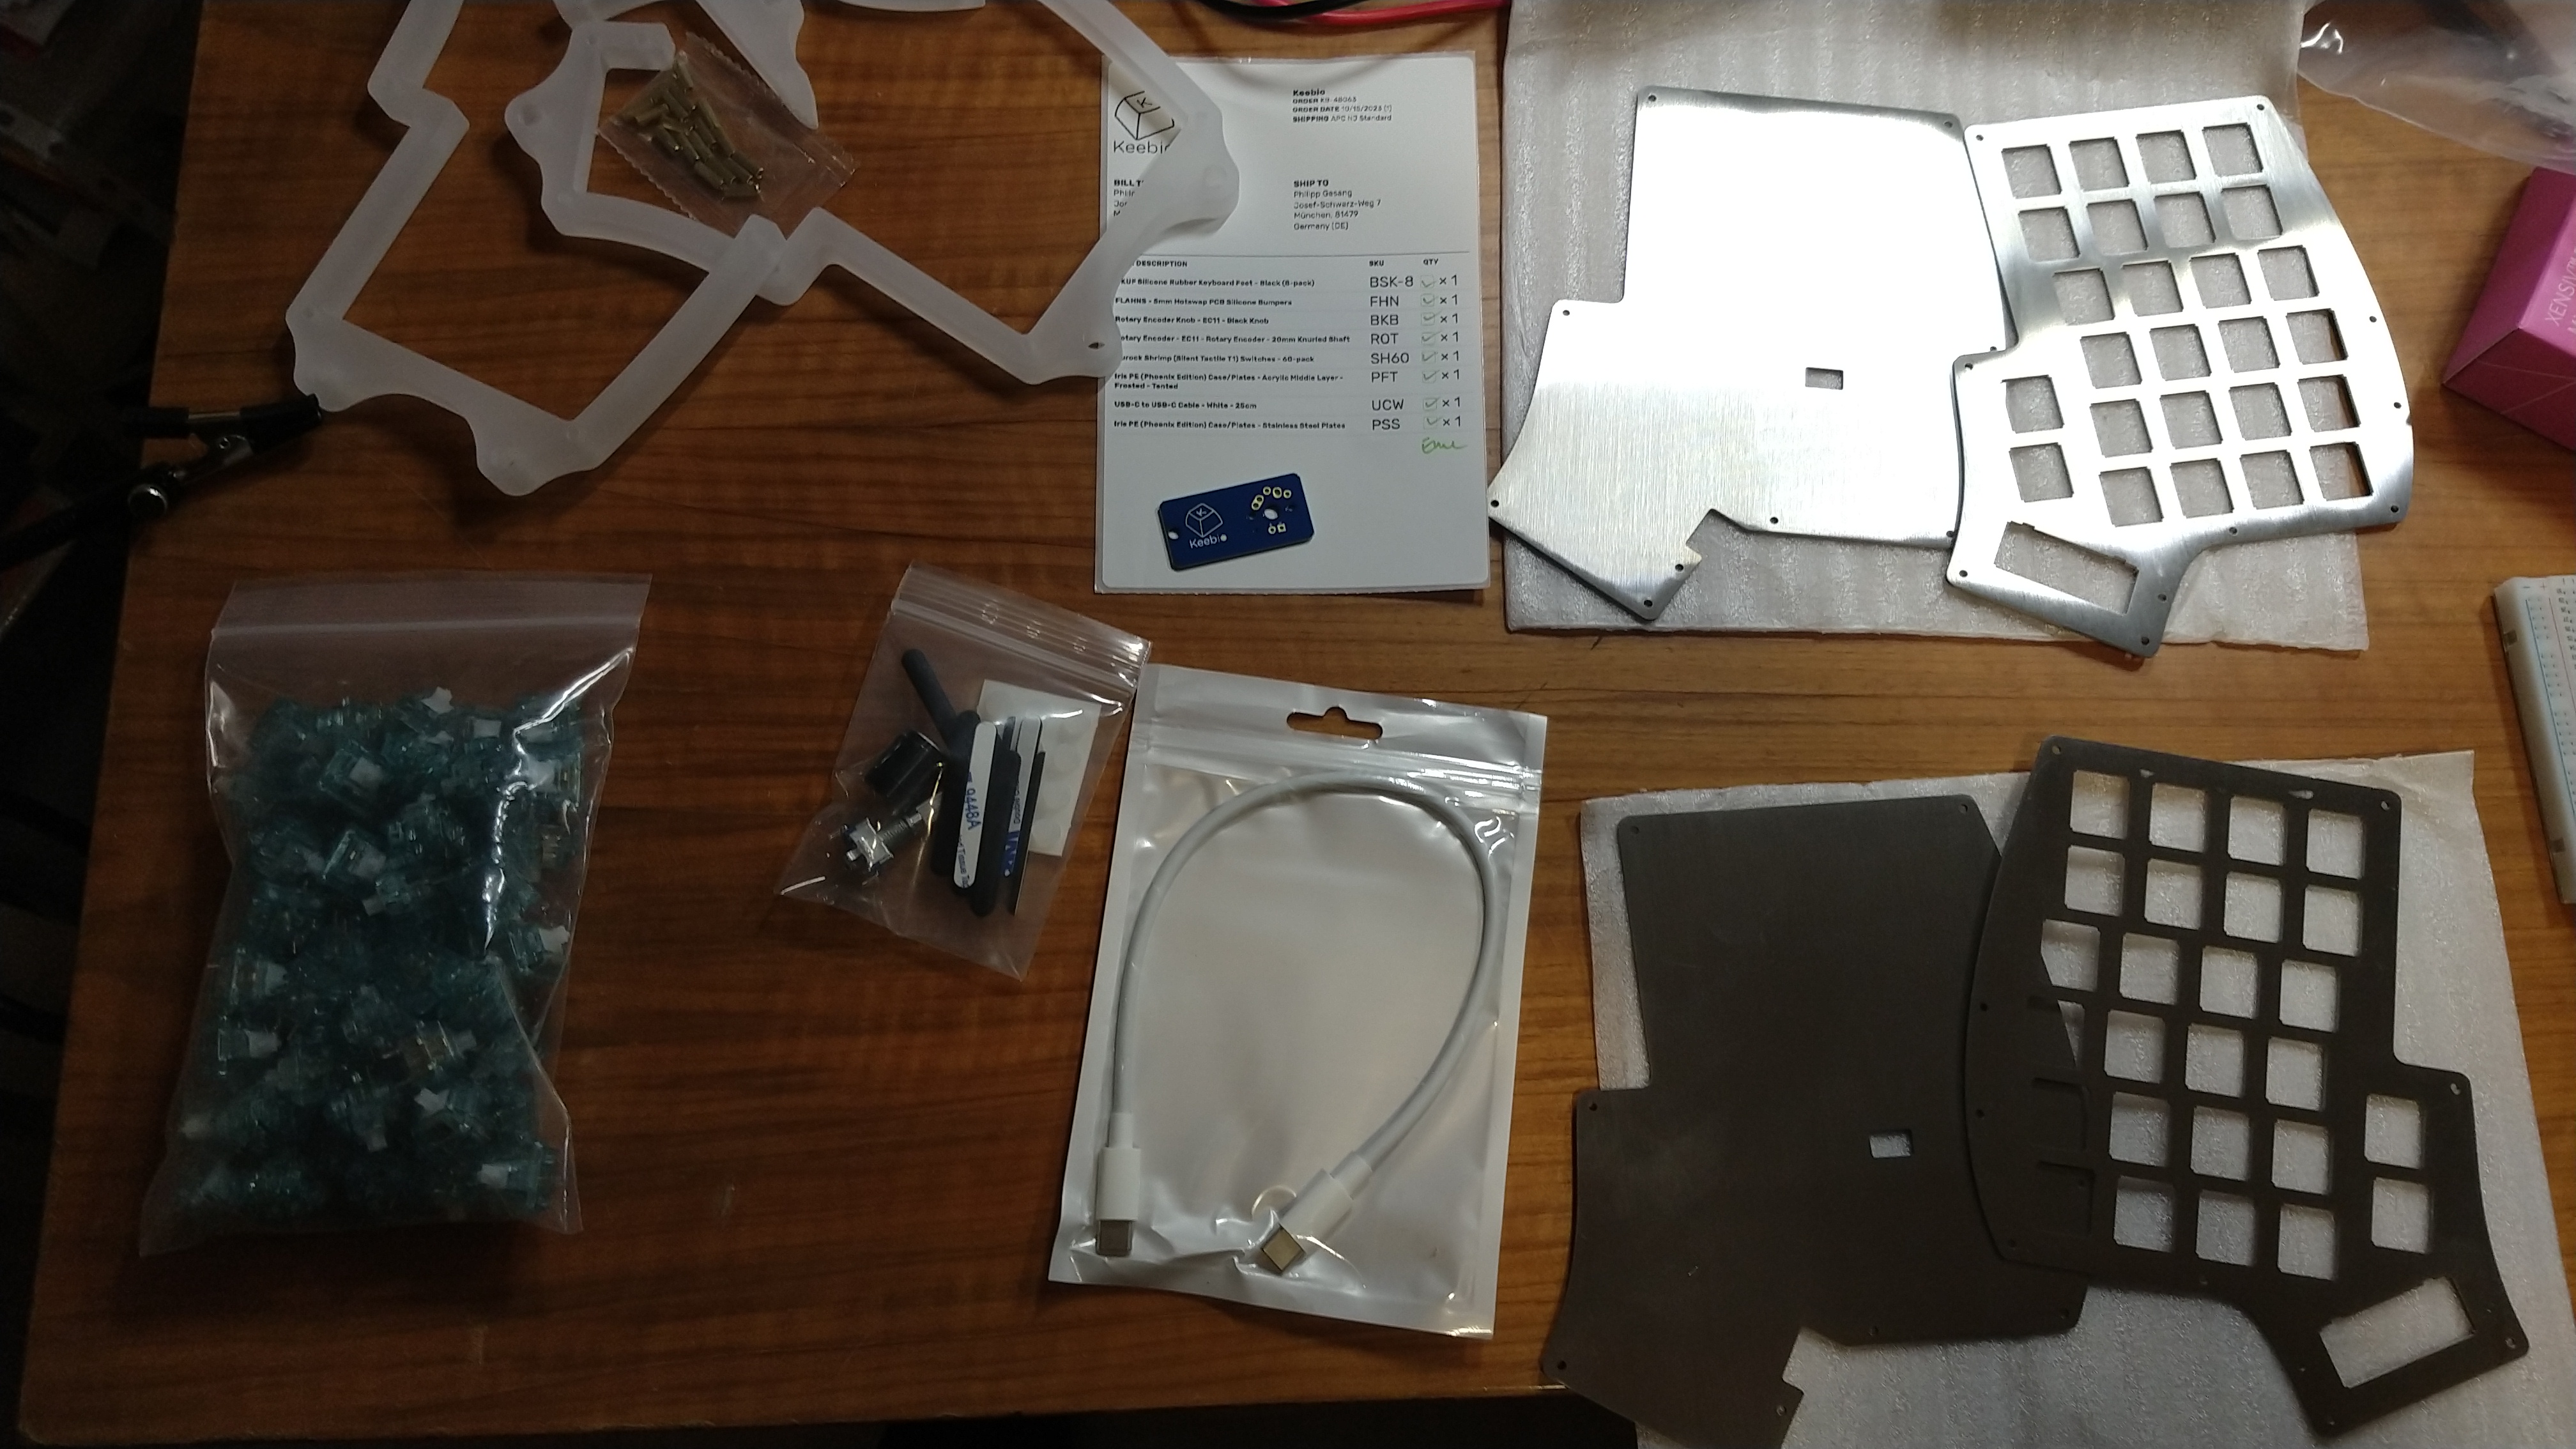
Parts
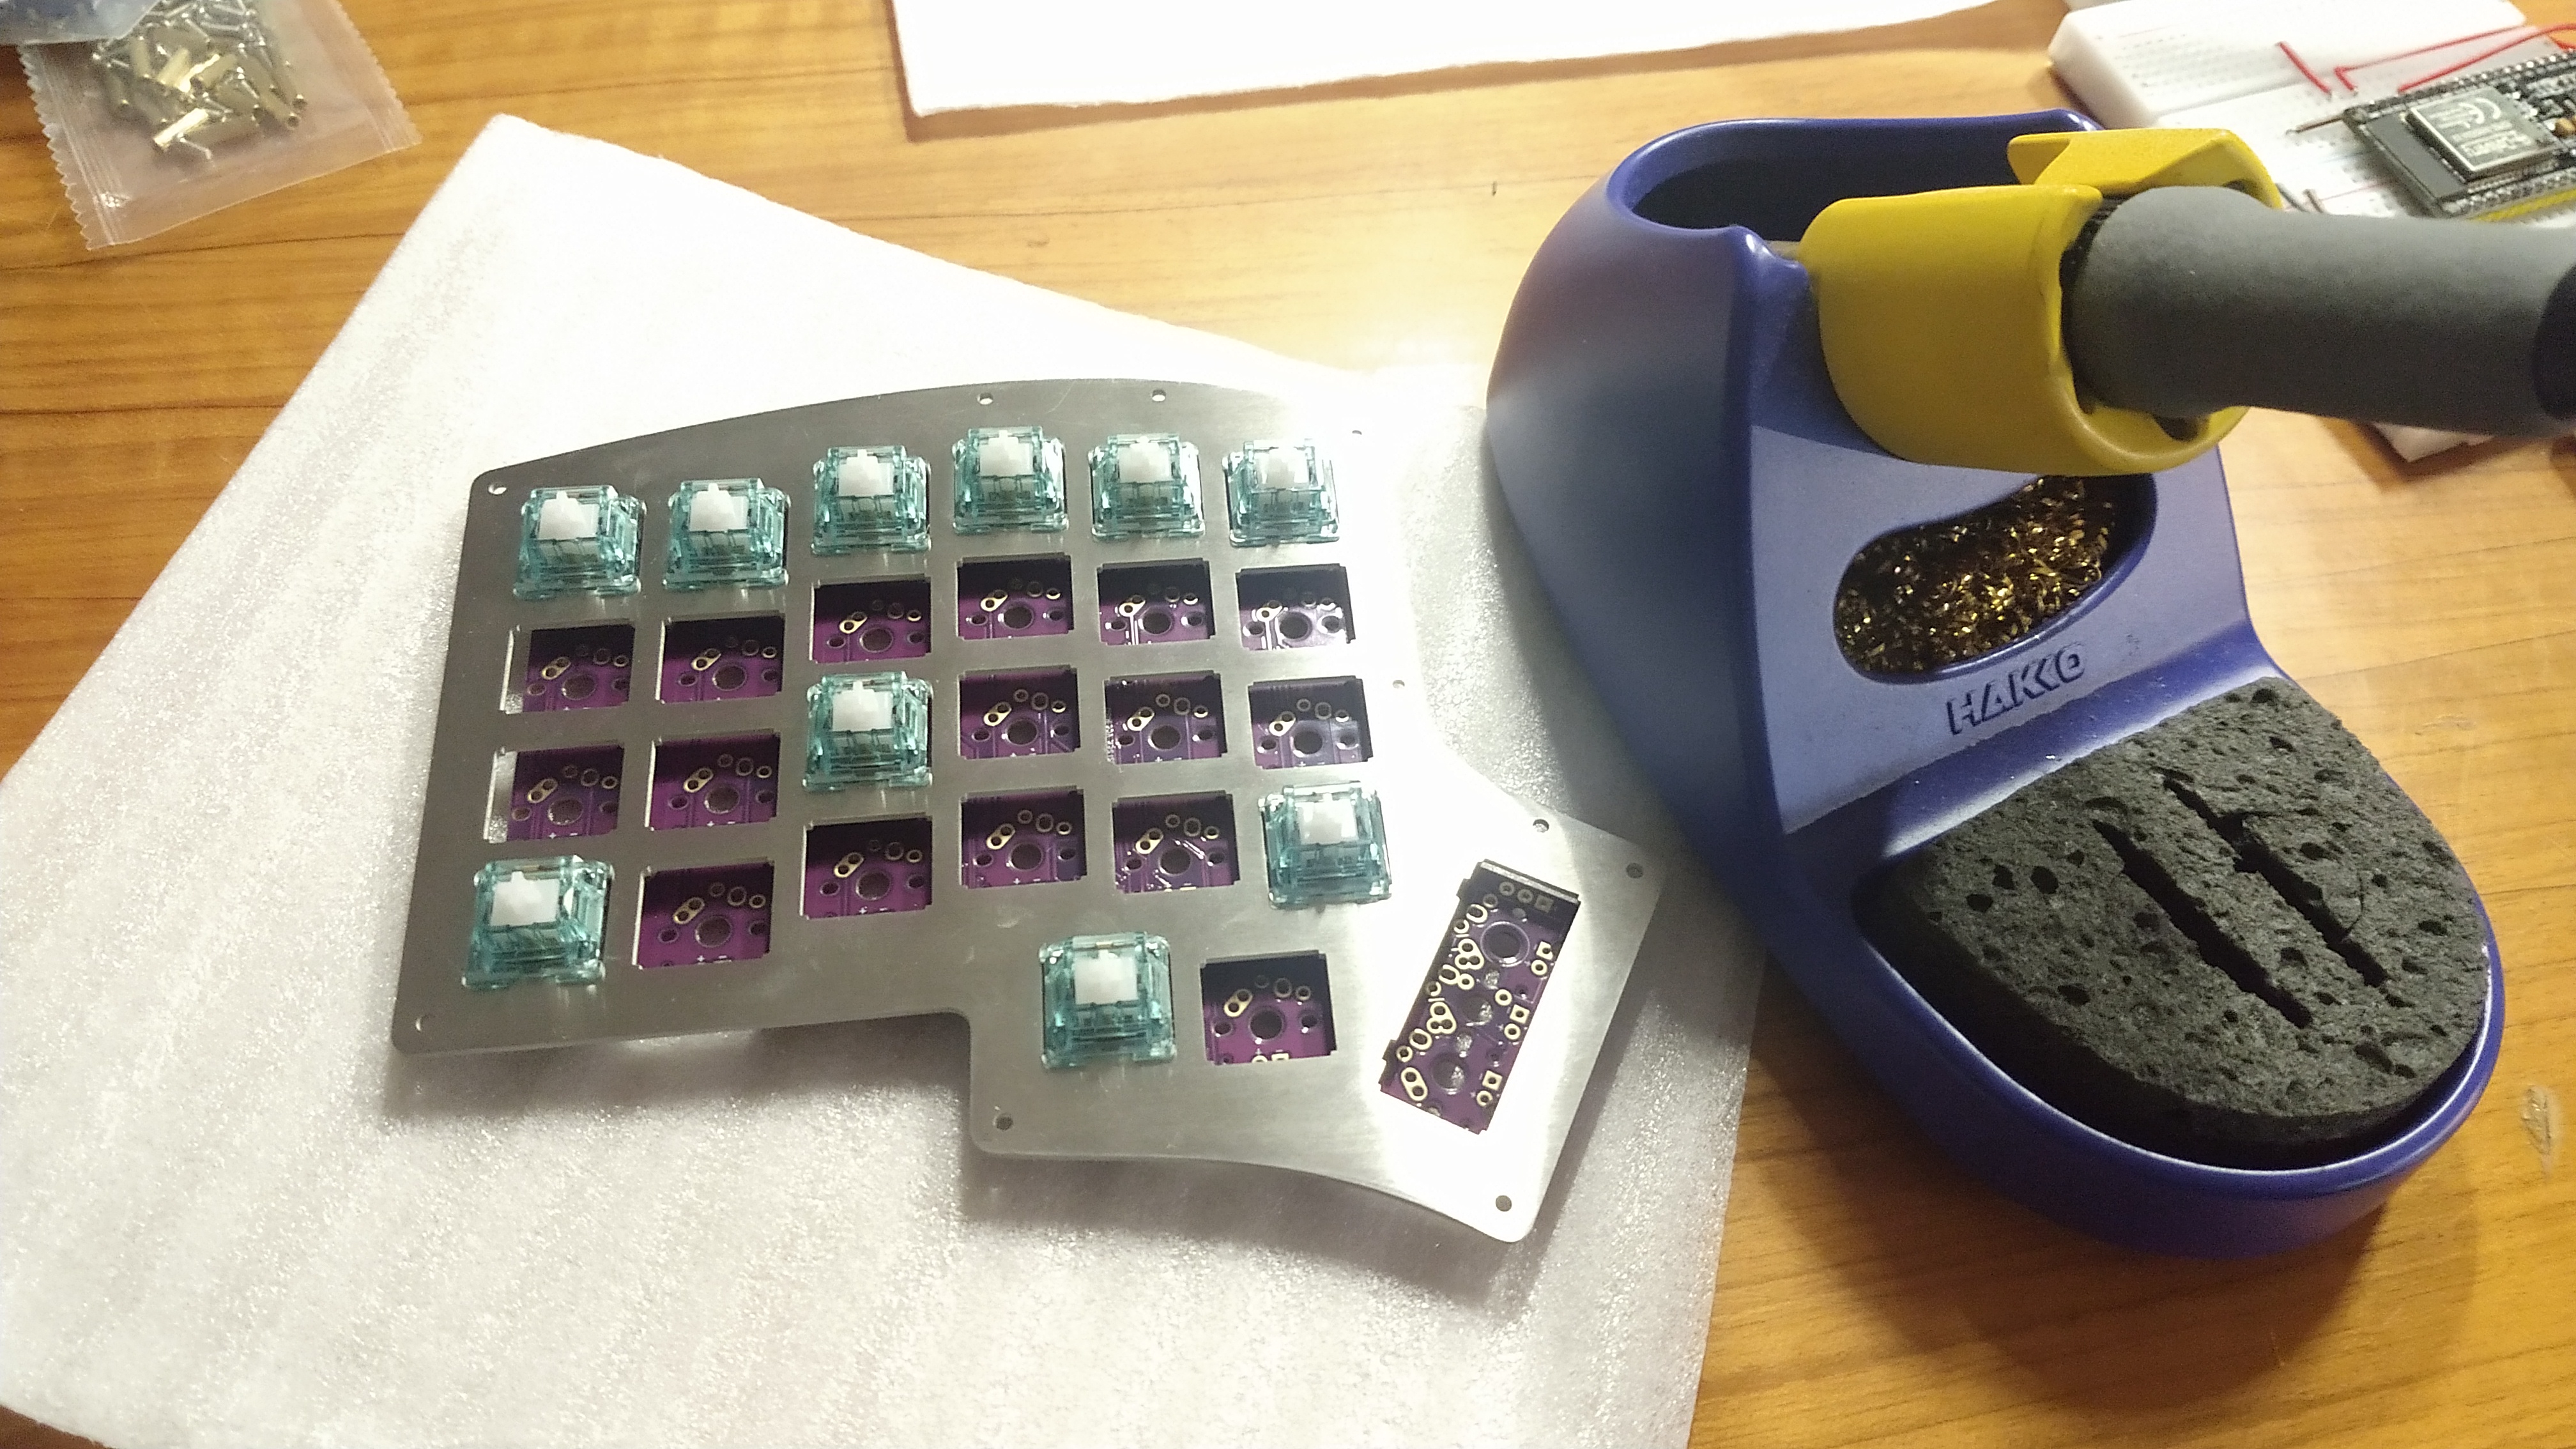
Arguably the most important part of a keyboard is the PCB. Keeb.io didn’t have the most recent editions of their boards in stock so I went with a rev5 one which is not hotswap capable, i. e. all the switches need to be soldered onto the PCB. I chose Durock “Shrimp” T1 type switches which promised a typing experience on the silent + tactile quadrant; especially the silent part convinced me as I have no intention of becoming “that guy” whose typing noise pervades every last corner of the office.
The bad luck I had with the PCB availability turned around with the case plates and I managed to order a set of elegant stainless steel plates. The alternatives are acrylic and FR4, however the latter without the familiar PCB green color. The steel plates combine beautifully with the frosted acrylic middle layer which ensures that the colorful light from the LEDs diffuses out through the sides of the halves.
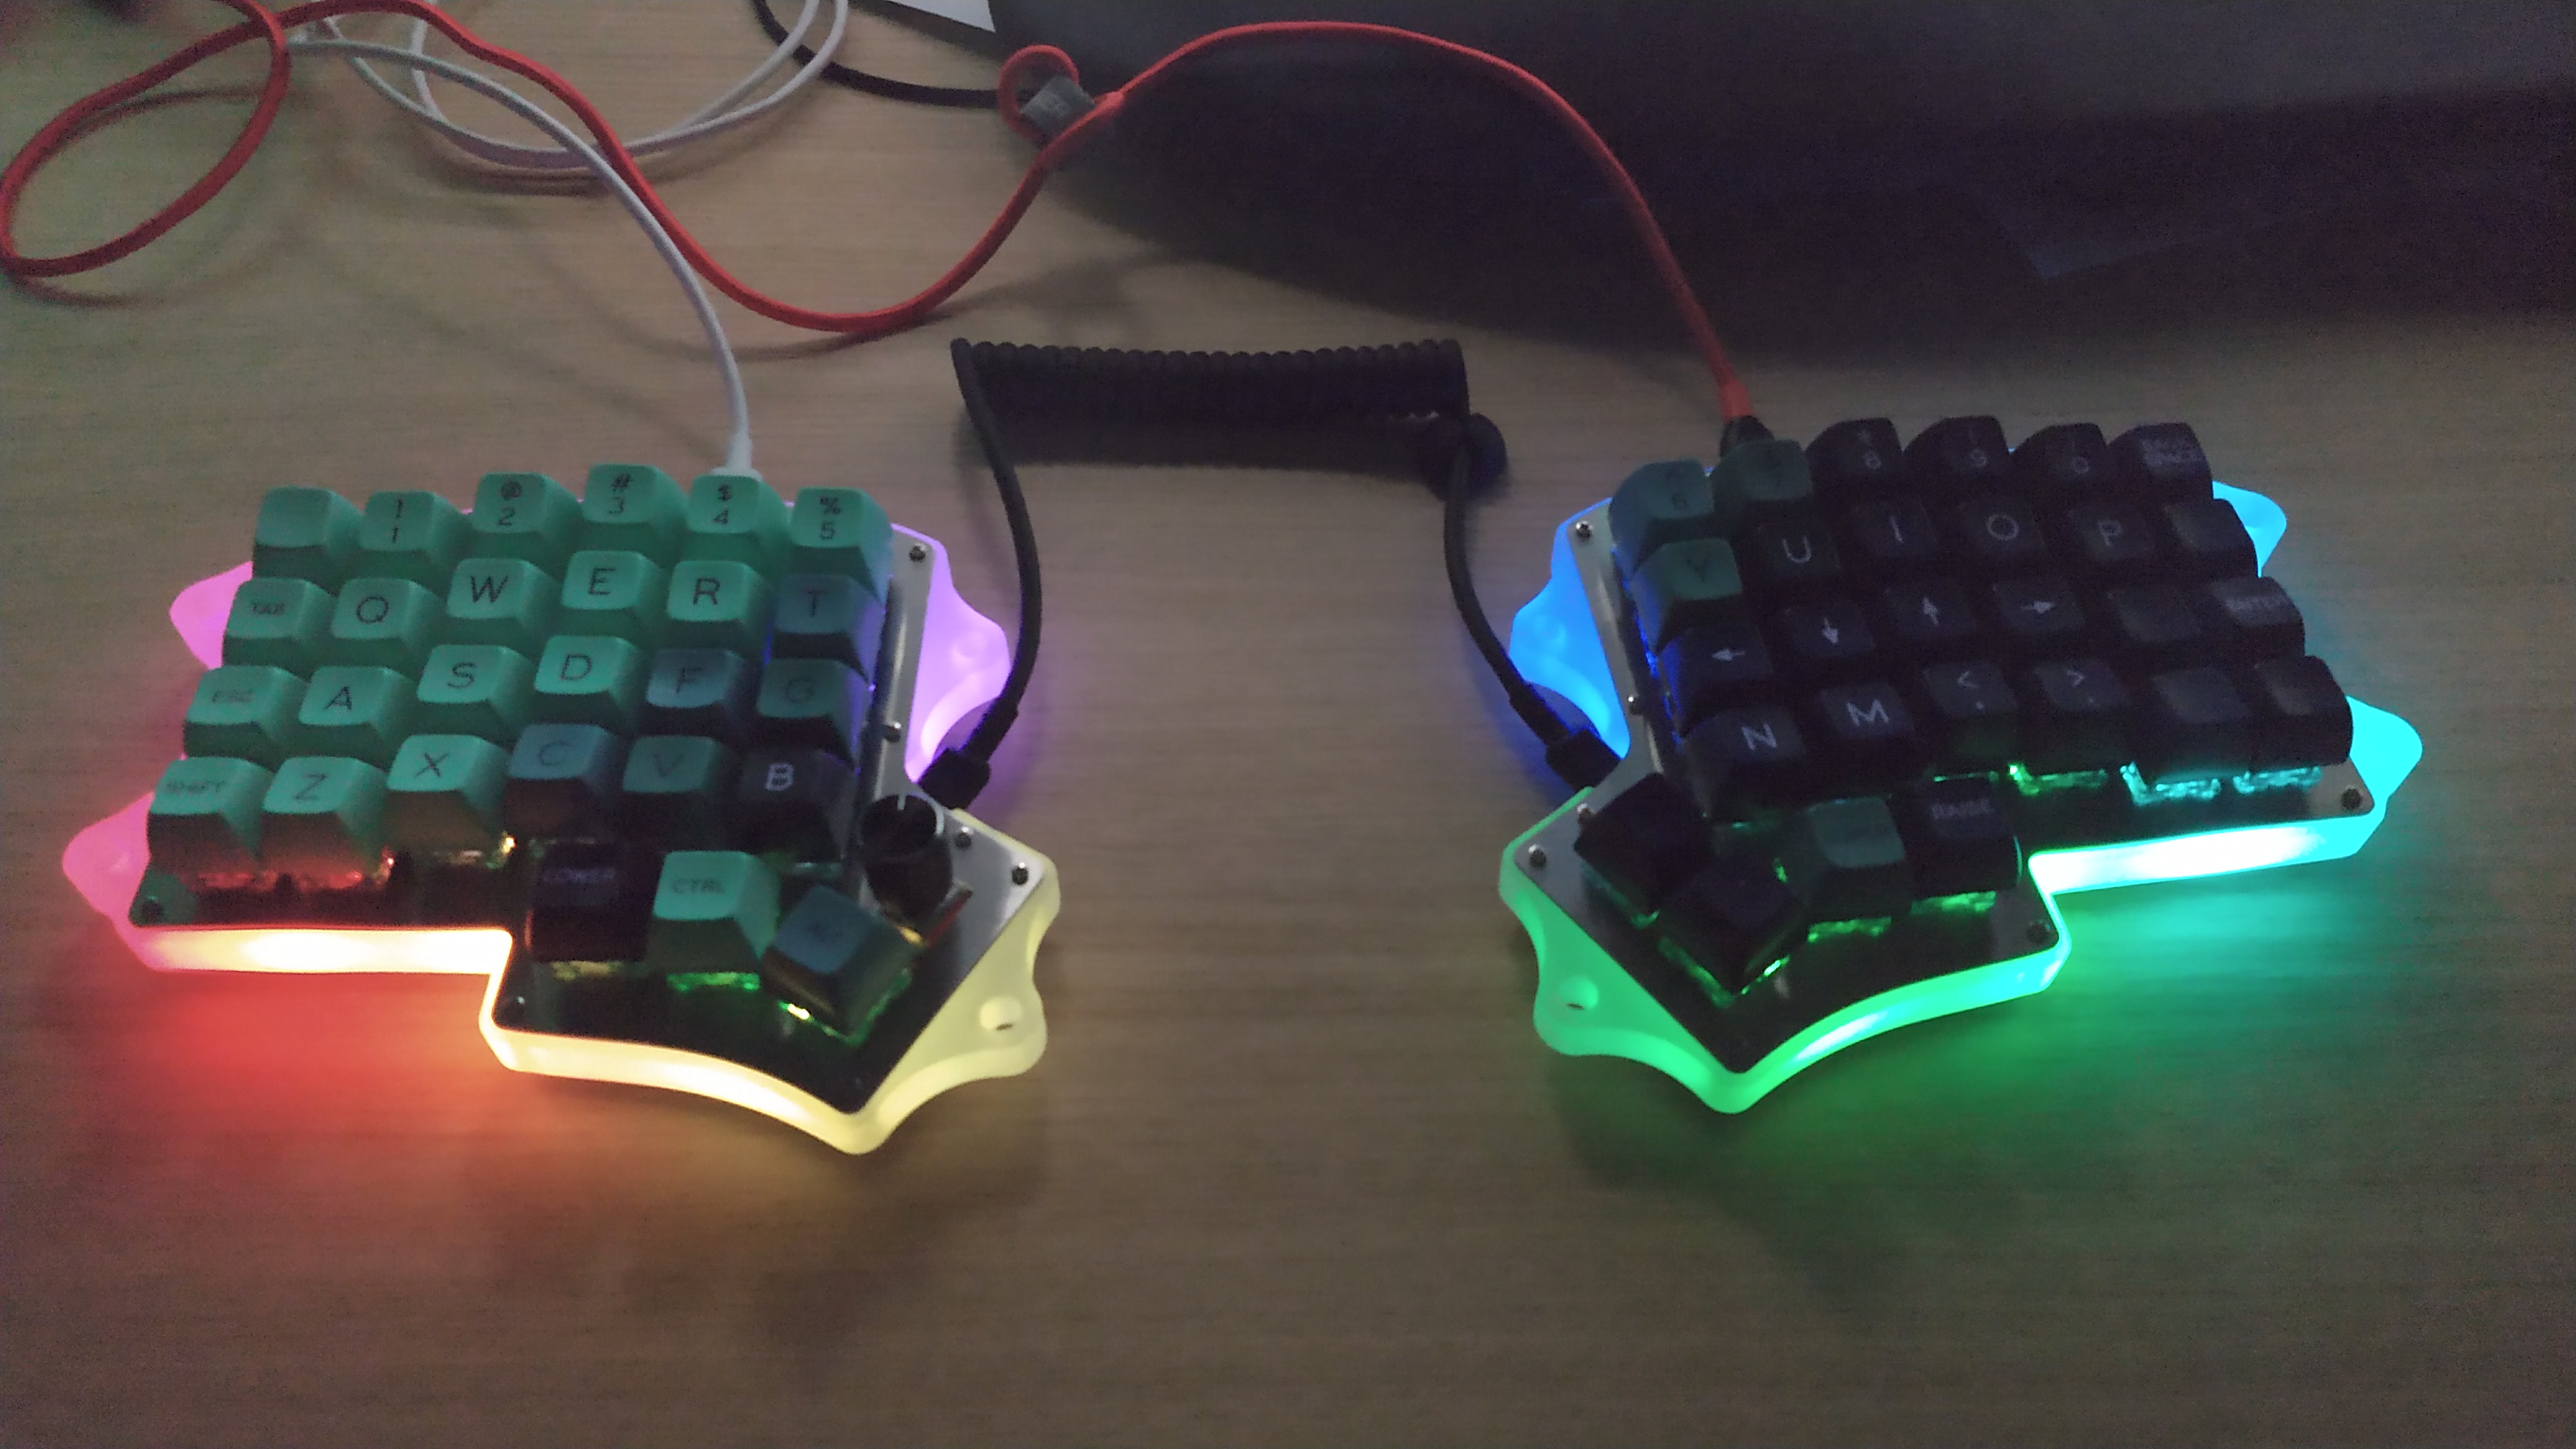
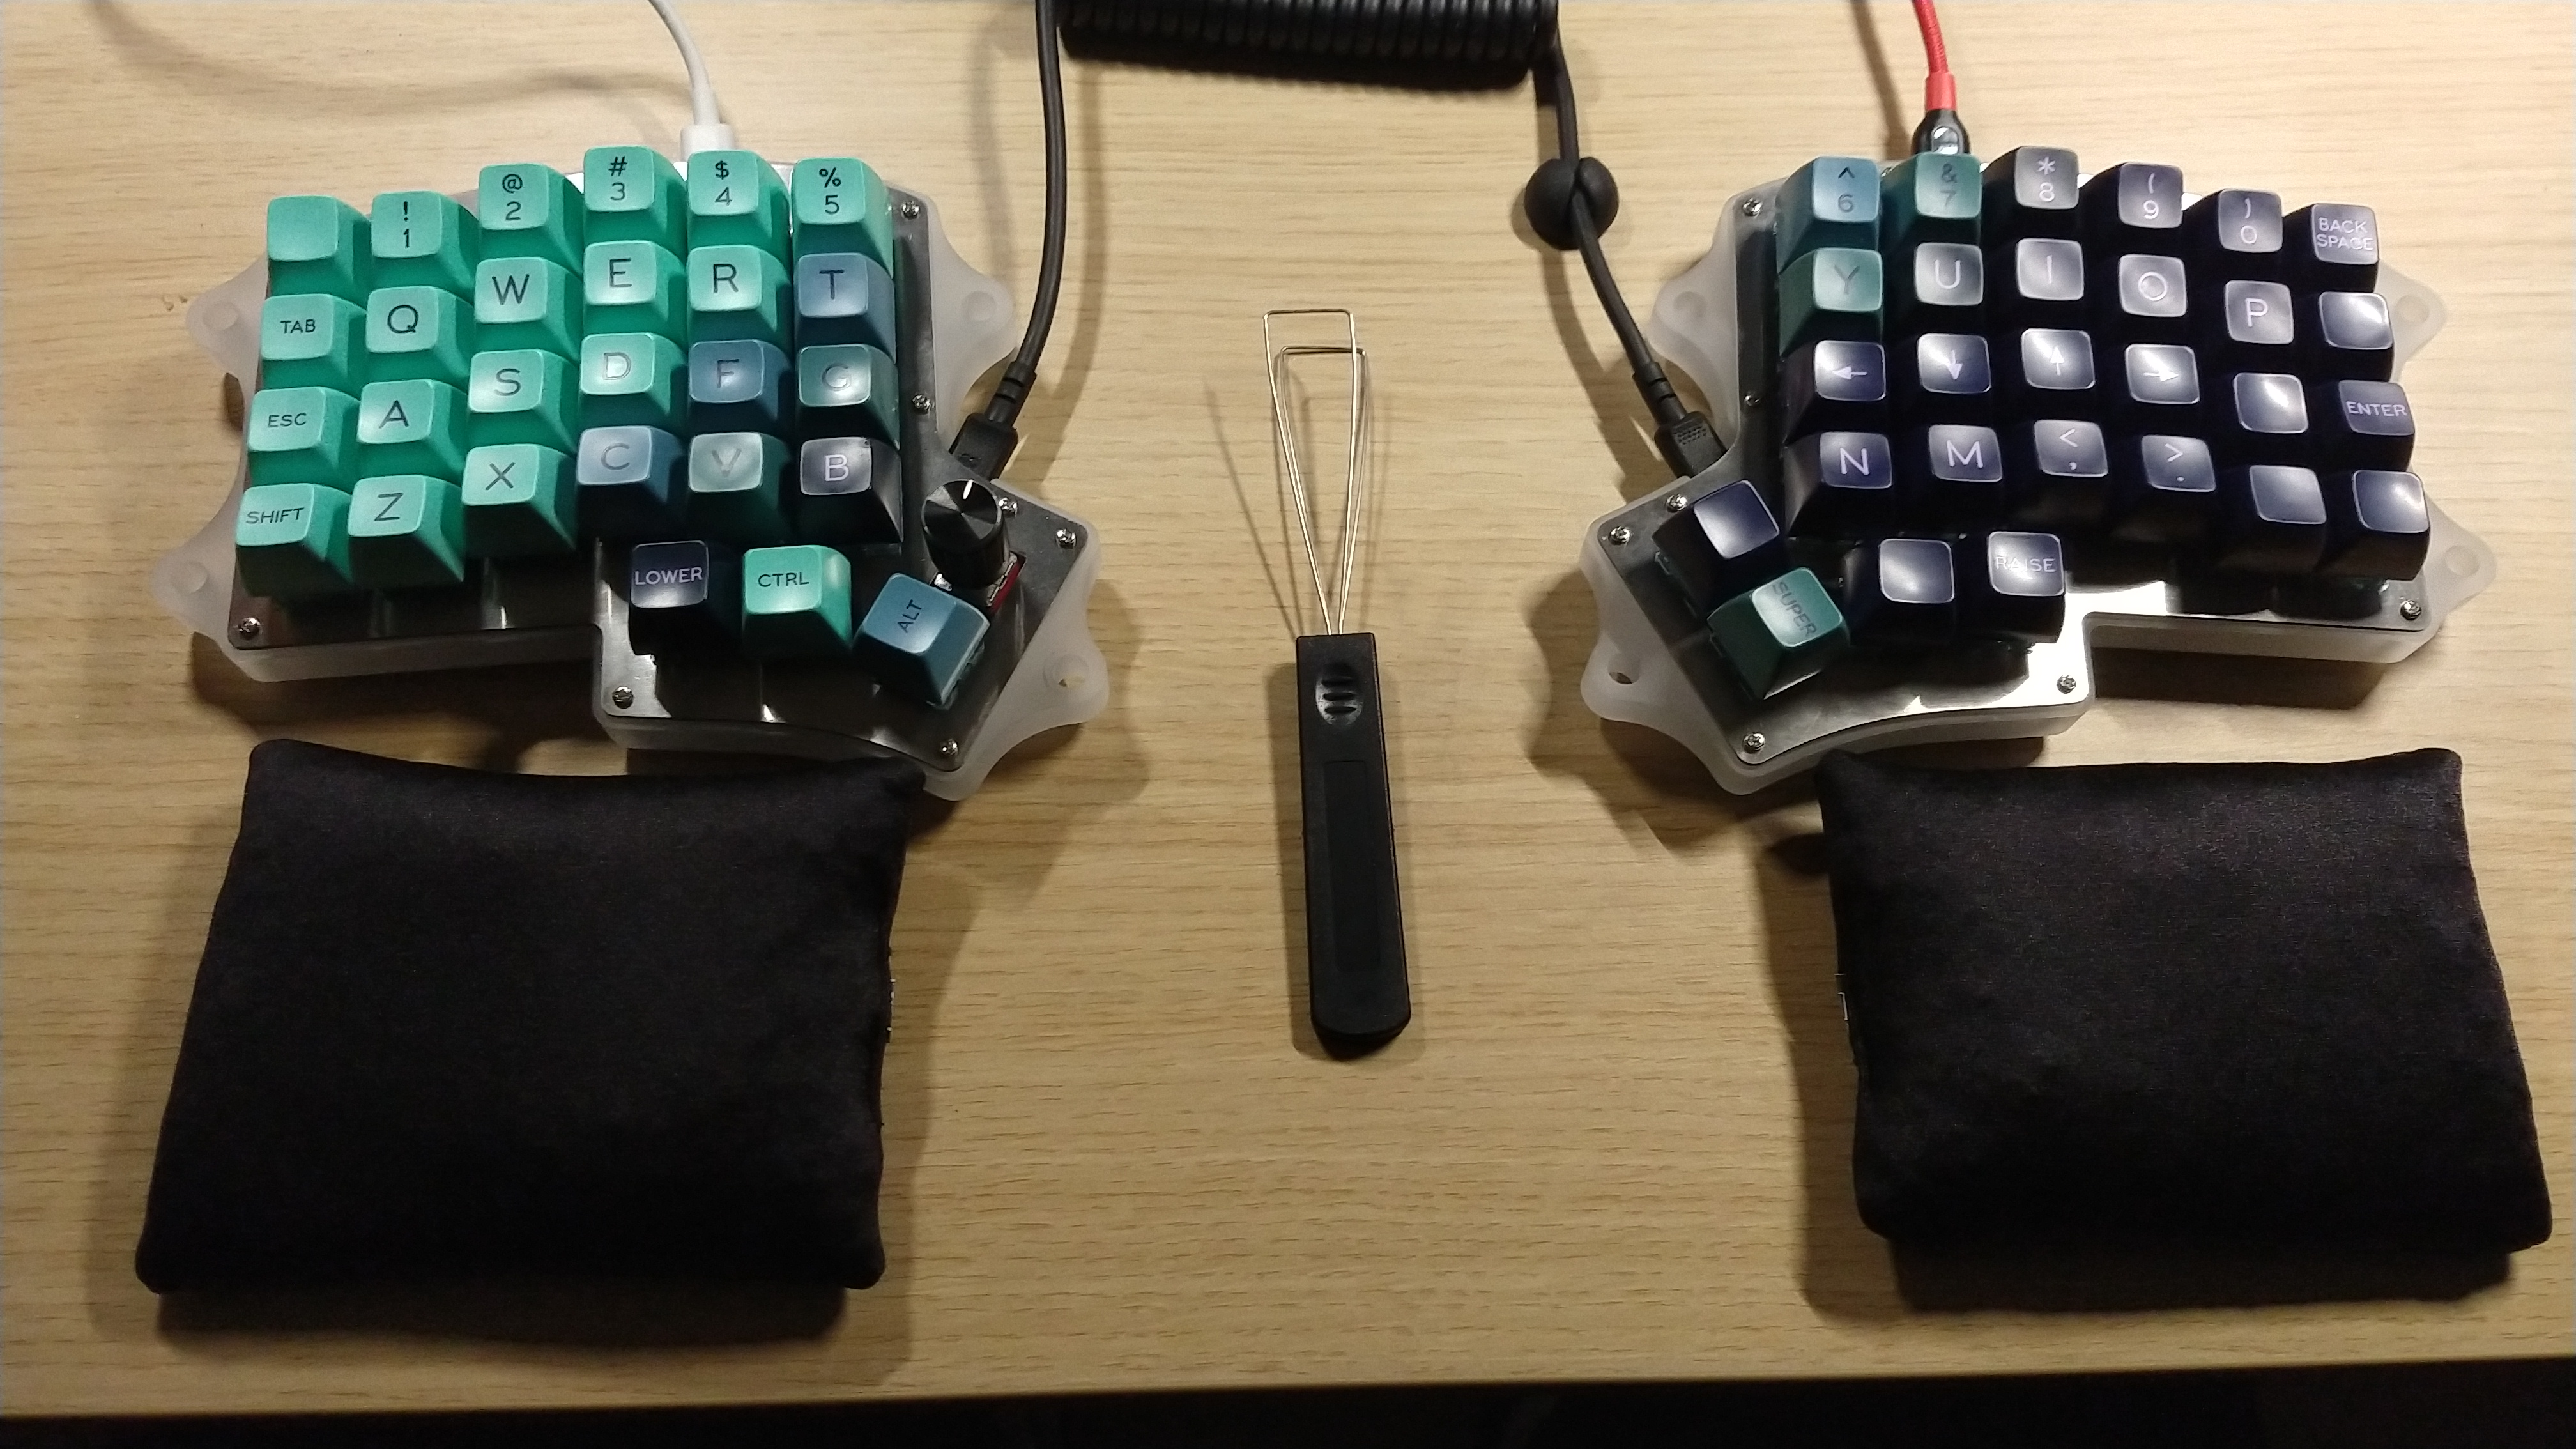
Surprisingly, procuring suitable keycaps took the most time. All the good ortholinear sets seem to be perpetually out of stock, at least on the sites that sell from inside the EU. After a few evenings researching caps I ended up on half a dozen watch lists and no actual caps. In the end I bit the customs bullet and bought two beautiful ortho sets through UK Keycaps, a DSA one and an SA one so I can give both extremes on the profile axis a try.
Assembly
Keeb.io deserve to be showered in praise for their excellent step-by-step documentation on how to build the Iris rev5 and all their other keyboards. Since all the parts are designed to fit together the assembly went rather smoothly and I finished it in one afternoon.
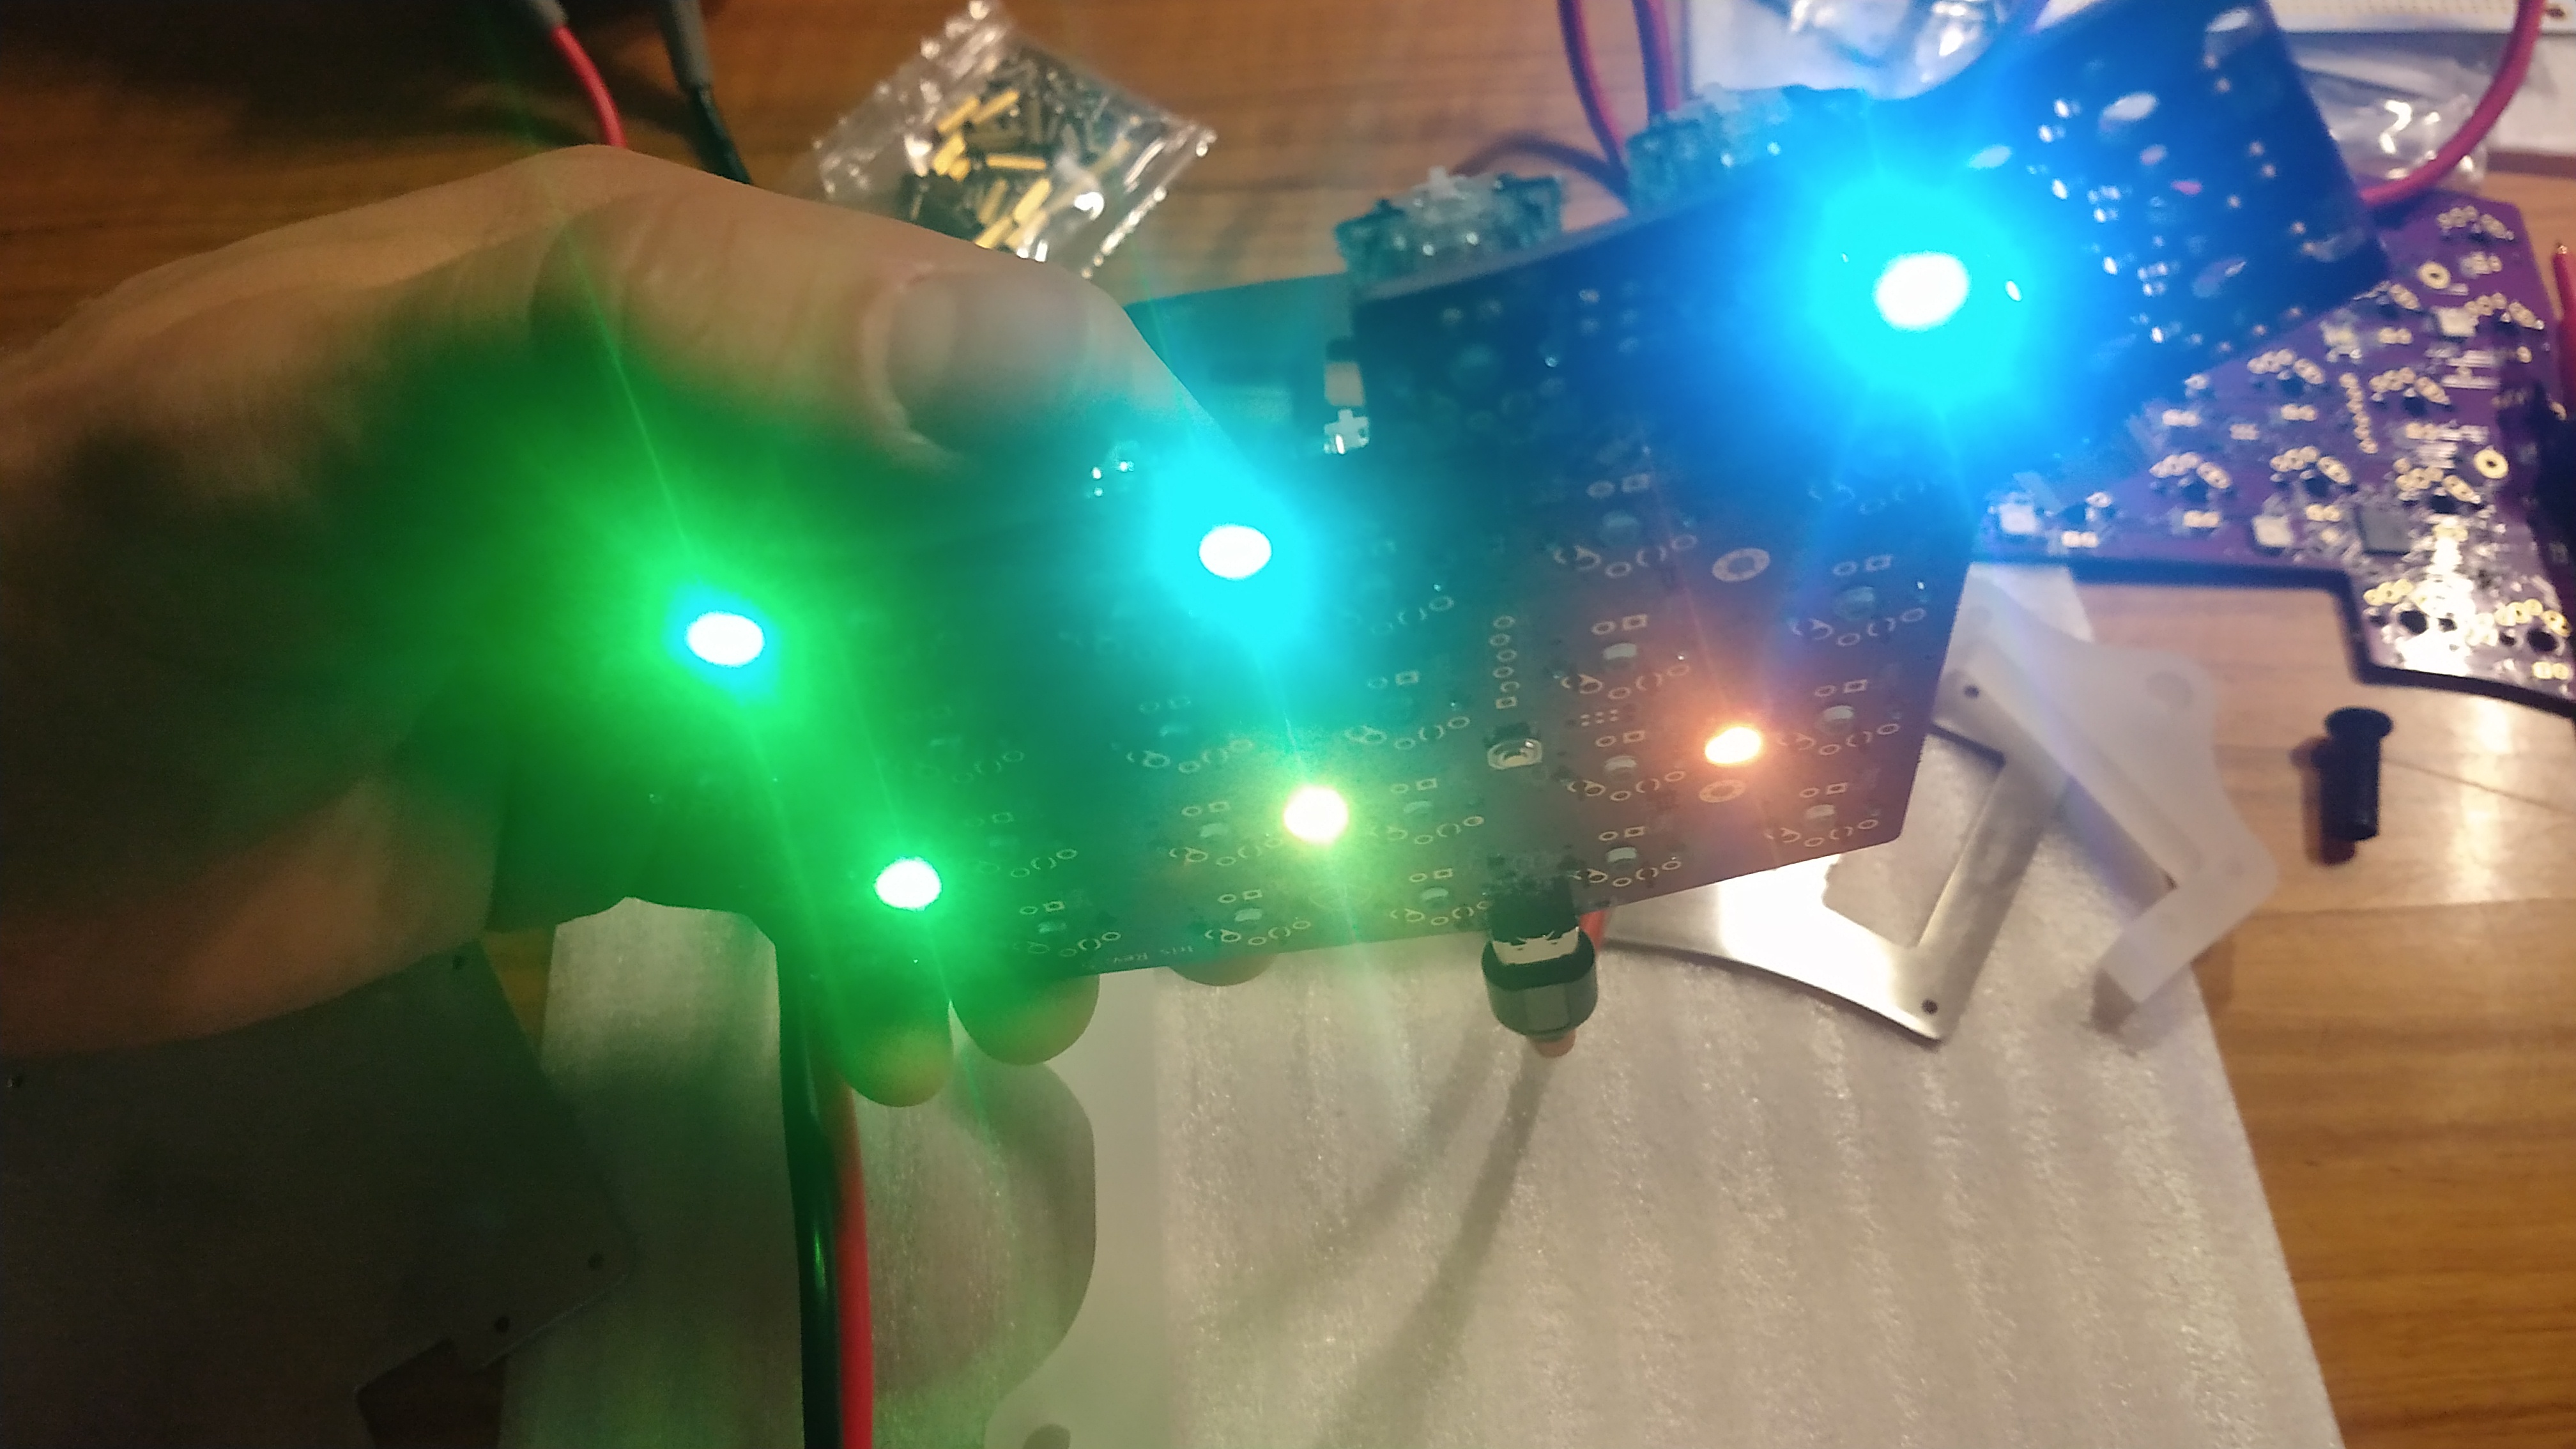
Soldering the switches turned out to be straightforward and took no more than 20 minutes for the second half. Or so I thought when I hit my first gotcha: when verifying my amateurish soldering work on the first half it turned out one of the keys did not produce events. Assuming a faulty switch I desoldered it with some effort and installed another one … without a change. I was already worrying I was dealing with a faulty PCB when I checked the other half with a multimeter: the same key did not yield input events there either. That was of course due to the QMK firmware which handles the raise and lower keys directly without sending events.
I also soldered a rotary encoder on the left half, replacing one of the harder to reach thumb keys. It looks cool but I doubt it’ll see much use. With the soldering done the rest of the assembly takes no more than five minutes per half. For now I ignored the tenting option as I prefer to collect some first-hand experience (pun again intended) before I reach for that kind of fine-tuning.
Firmware
With the Iris fully assembled, the fun finally begins: it is time to tailor the firmware to one’s needs. It’s not an entirely frivolous exercise though. Firmware hacking is an integral part of setting up a reduced keyboard like the Iris since one needs to find and define suitable replacements for all the keys that are no longer directly reachable. With its 4×6 matrix and four slots for thumb keys per half the Iris has only about 54 % of the keys of a standard 104 key layout available for mapping, and 44 % compared to the most recent edition of the clunky MS Ergonomic line with its silly emoji keys and all.
The result is available on my fork of QMK on Gitlab.
Layout
The trick to utilizing the keyboard to its fullest capability is making liberal use of layers. Layers defined in firmware add on top of the layers handled by the operating system like e. g. the second (Shift) and third (Alt-Gr) layers in most European style layouts.
As an example, I ended up with this default layer:
const uint16_t PROGMEM keymaps[] [MATRIX_ROWS] [MATRIX_COLS] = {

  [_QWERTY] = LAYOUT(
  //┌────────┬────────┬────────┬────────┬────────┬────────┐                          ┌────────┬────────┬────────┬────────┬────────┬────────┐
     KC_TILD, KC_1,    KC_2,    KC_3,    KC_4,    KC_5,                               KC_6,    KC_7,    KC_8,    KC_9,    KC_0,    KC_BSPC,
  //├────────┼────────┼────────┼────────┼────────┼────────┤                          ├────────┼────────┼────────┼────────┼────────┼────────┤
     KC_TAB,  KC_Q,    KC_W,    KC_E,    KC_R,    KC_T,                               KC_Y,    KC_U,    KC_I,    KC_O,    KC_P,    KC_LBRC,
  //├────────┼────────┼────────┼────────┼────────┼────────┤                          ├────────┼────────┼────────┼────────┼────────┼────────┤
     KC_CAPS, KC_A,    KC_S,    KC_D,    KC_F,    KC_G,                               KC_H,    KC_J,    KC_K,    KC_L,    KC_SCLN, KC_ENT,
  //├────────┼────────┼────────┼────────┼────────┼────────┼────────┐        ┌────────┼────────┼────────┼────────┼────────┼────────┼────────┤
     TD(LCP), KC_Z,    KC_X,    KC_C,    KC_V,    KC_B,    KC_HOME,          KC_APP,  KC_N,    KC_M,    KC_COMM, KC_DOT,  KC_SLSH, TD(RCP),
  //└────────┴────────┴────────┴───┬────┴───┬────┴───┬────┴───┬────┘        └───┬────┴───┬────┴───┬────┴───┬────┴────────┴────────┴────────┘
                                    LOWER,   KC_LCTL, KC_LALT,                   KC_RALT, KC_SPC,  RAISE
                                // └────────┴────────┴────────┘                 └────────┴────────┴────────┘
  ),
More interesting than the QWERTY alphanumeric keys are the thumb keys and the
outer columns.
The LOWER and RAISE keys are where the magic happens.
They switch the keyboard the eponymous layers when held which allows sending
a completely different set of keycodes.
Since the raise/lower keys are located on both halves I assigned navigation keys
to their respective opposite half, WASD for the left hand and hjkl for
the right hand.
The thumb key with the KC_APP code here also switches to a fourth layer with
number pad mappings on each half.
I left the default layer as QWERTY as possible otherwise.
Getting carried away here would only break the numerous OS side key layouts and
tweaks that I commonly use.
E. g. remapping ESC to CAPS in the firmware will invert the
caps:swapescape setting in X11 which is still necessary for e. g. laptop
keyboards that vendors refuse to make customizable to this day.
Likewise swapping the first and second layers of the number row is better done
in the OS with XKB et al. for the same reason: it works everywhere and not
just on keyboards that allow flashing.
Thus QMK with its vast flexibility can only complement OS side customization,
not replace it.
Tap Dance and Tap/Hold
A more esoteric feature of QMK is the so-called “tap dance” which allows
overloading keys on a single layer by making them behave differently when
tapped multiple times in a row.
E. g. on the layout above, TD(LCP) is defined like this:
enum tap_handlers { LCP, RCP };

tap_dance_action_t tap_dance_actions[] = {
    [LCP] = ACTION_TAP_DANCE_DOUBLE(KC_LSFT, KC_ESC),
    [RCP] = ACTION_TAP_DANCE_DOUBLE(KC_RSFT, KC_ESC),
};
which makes it act as a standard Shift key when tapped once or held, and as CAPS Lock when pressed twice in a row.
Tap/hold is a similar concept that can be used to negotiate two different roles for a modifier key:
#define T_SP_CL LCTL_T(KC_SPC)
#define T_SP_CR RCTL_T(KC_SPC)
These two keys act as Space or CTRL depending on whether another key was pressed concurrently in a 200 ms window.
Color
The six LEDs per half can be made to serve for more than just effect. In my case they indicate the active layer and what host LEDs (caps, num lock, scroll lock) are set with different colors. QMK provides a number of color effects like rainbows and gradients that come in handy when simple unicolor lighting is insufficient to convey all the status combinations. And of course when you need a fancy disco lightshow.
Adapting
Already after the first few keystrokes I noticed the Iris conveyed instant benefits over the more conservative layout of the MS Ergonomic. The difference in ergonomics of frequently used modifiers like Alt and Ctrl is striking: with the chunky space bar gone I can now operate my window manager without acrobatics in the left hand. (It deserves mention that the MS Ergo already has a rather short space bar to begin with, allocating effectively 1.5u to it on each half.) Likewise for the compose key (Menu / Multi) that I mapped to the upper thumb key of the right half where it is much more easily reachable than those “Windows keys” that I invariably had to operate with the outer side of my palm.
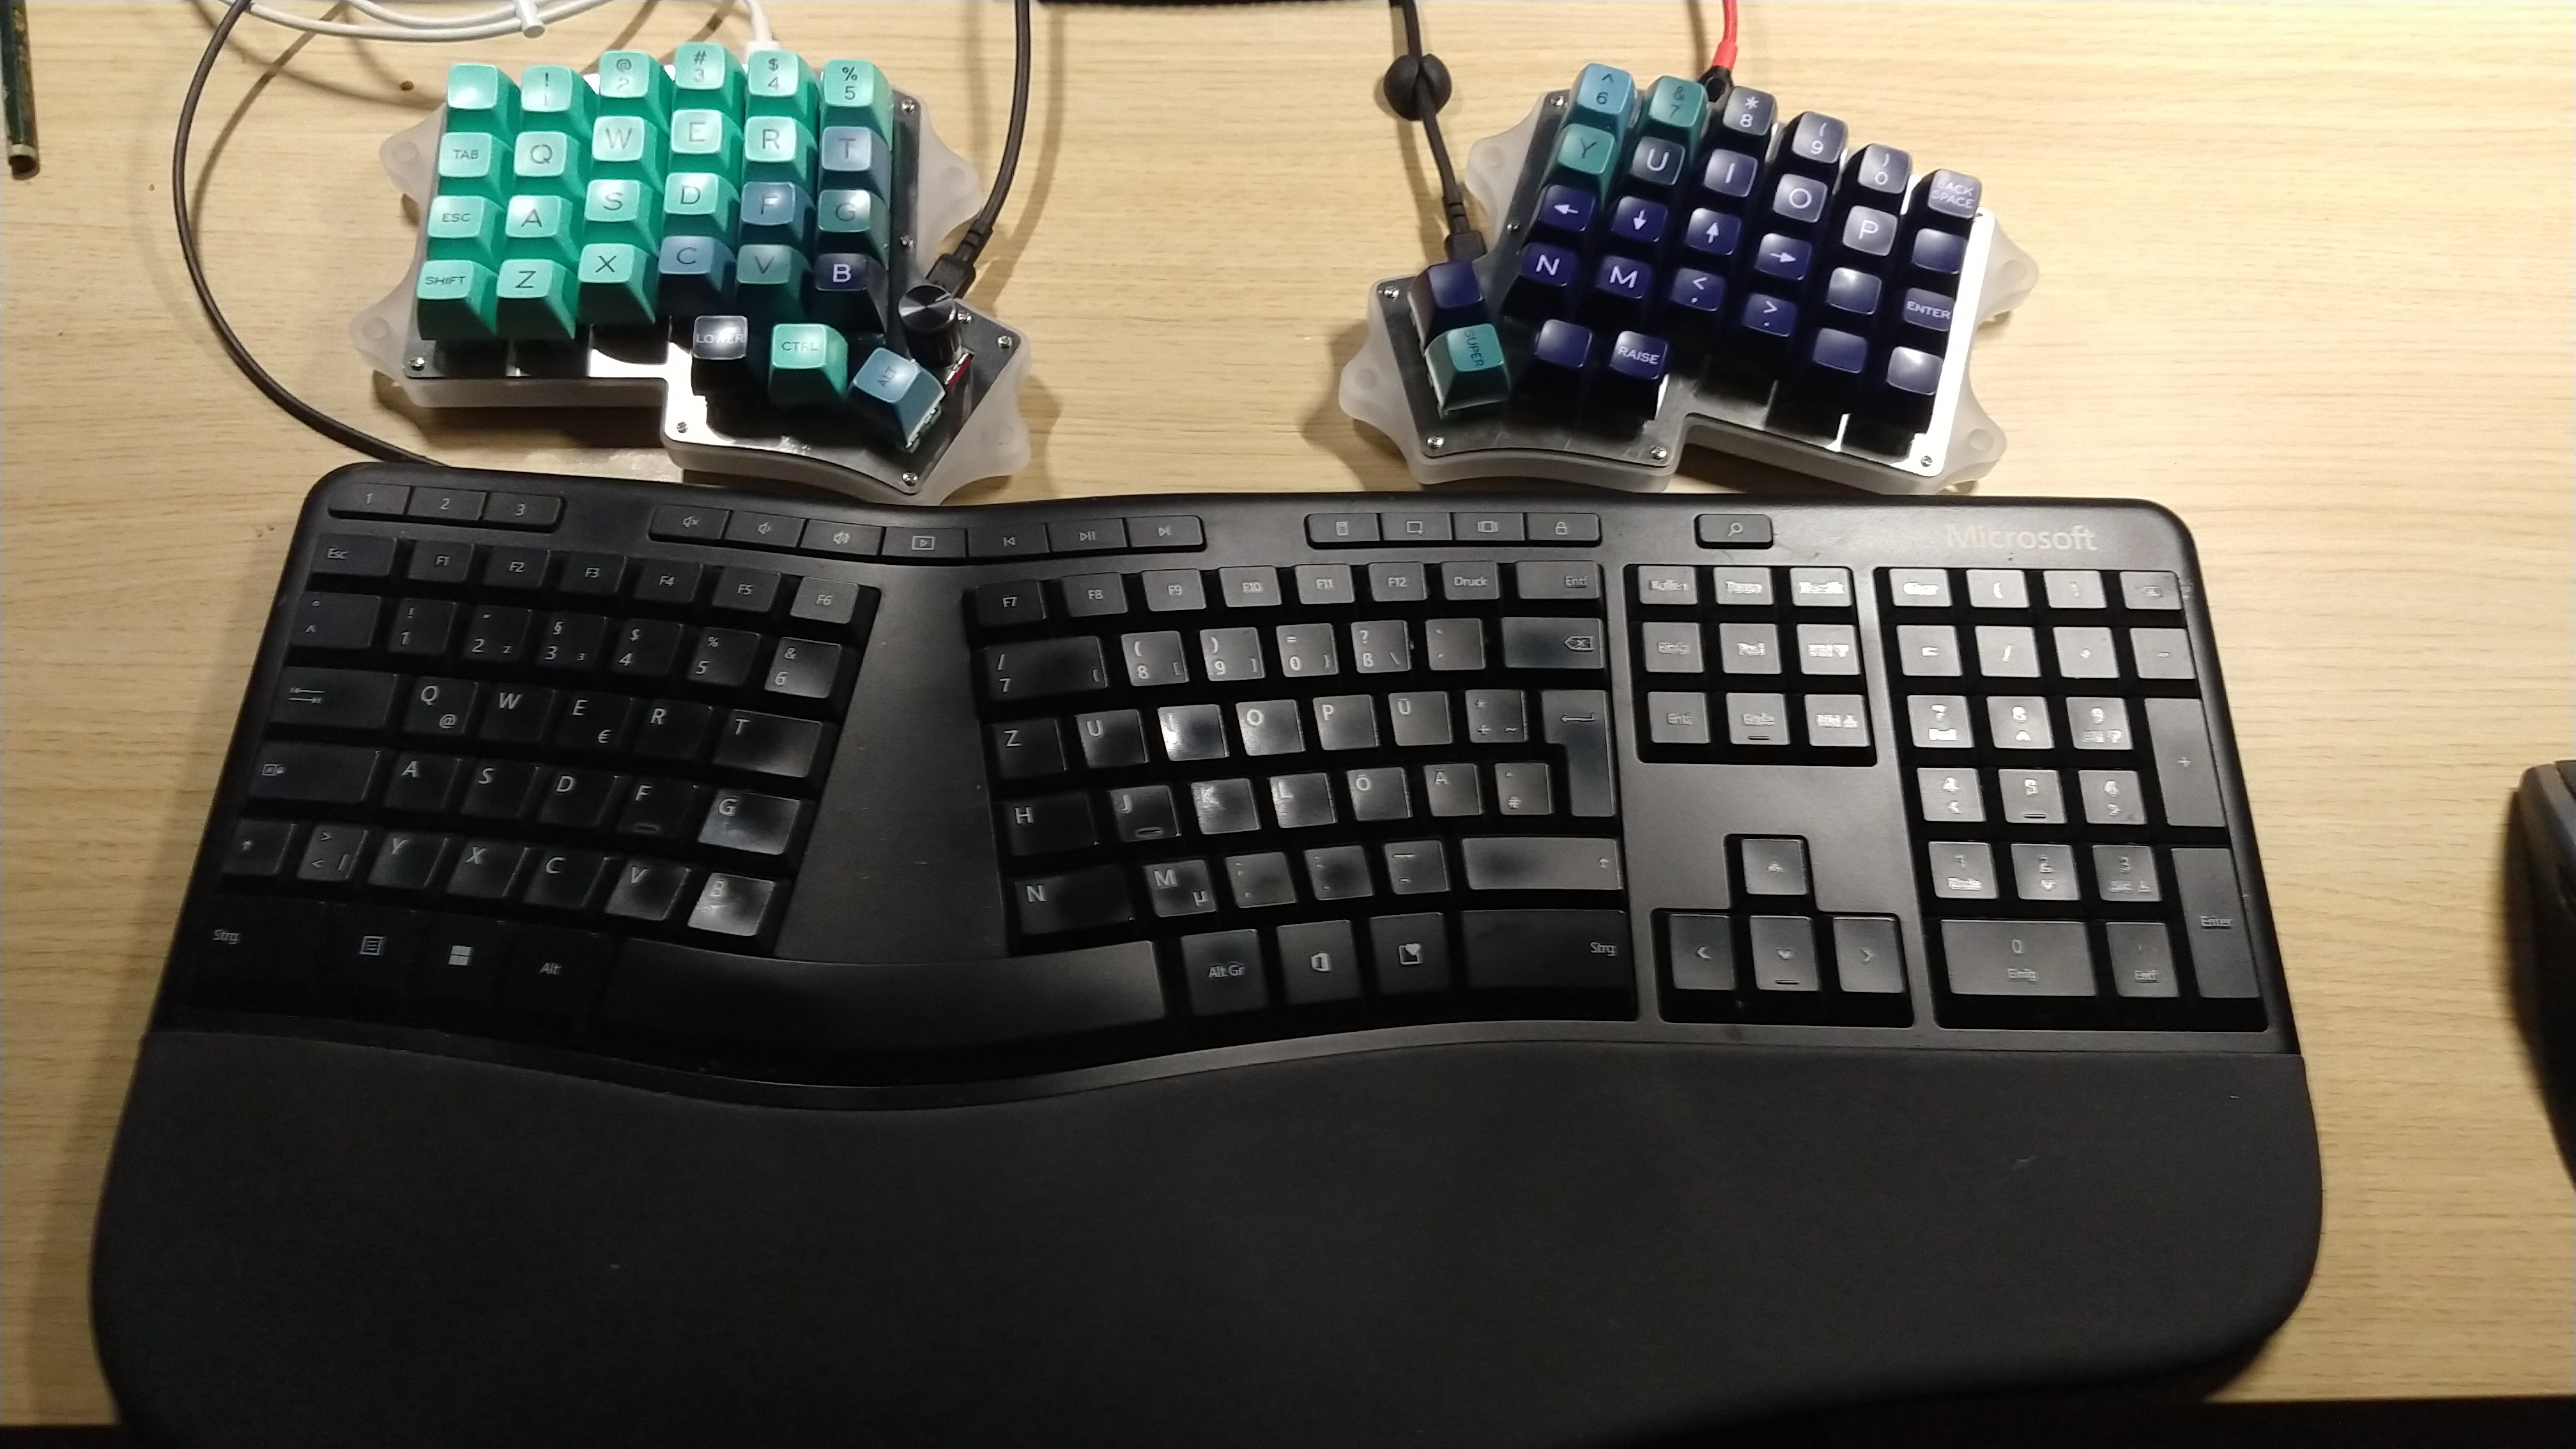
The more compact form factor is a breeze of fresh air too. The Iris does away with the useless bits of standard layouts like the rows of function and “multimedia” keys and the number pad, saving precious real estate on the desk.
However these advantages come at a price. I never was a quick or accurate typist to begin with but the initial stroke rate after switching to the Iris was just agonizingly slow. My sloppy touch-typist neurons struggle under the pressure to rewire to the new layout and I am very much looking forward to leaving this steep bottom section of the learning curve again. There’s plenty of obstacles to overcome though: Having the Alt keys more to the center than than the Space keys probably confuses my acquired neural wiring the most, often to the point that I forgot what I wanted to type by the time I finally realize the funny sequence of characters in my editor results from holding Space instead of Alt-Gr. Also, and this seems to be a contentious decision among split keyboard architects, having the number 6 on the right half just feels wrong. I am experiencing a painful déjà-vu of my struggle to disassociate the letter b from the right hand when I switched to the MS split keyboard almost a decade ago.
Peripheral keys like Backspace pose a challenge as well. It appears that the further from home row a key is, the more likely my fingers are to trip over the non-staggered key arrangement. Thankfully that effect is manageable as only a few keys remain in that periphery after relocating most of them onto different layers. That relocation however is far from ideal as of yet as it requires some hard to remember key combos; same as with my OS side layouts I expect the eventual layout to emerge in a long refinement process that may take years.
Though after one day of using the Iris exclusively I already know going back is not an option. So naturally I already ordered another one.
gallery